Whip up a platter full of red, white, & blueStrawberry Cheesecake Bites for an easy and tasty 4th of July ... or
any time ... treat. CLICK HERE TO PIN THIS FOR LATER
Spicy Cajun Pretzels ~ Mini pretzel twists are seasoned with Old Bay, Ranch
seasoning, and cayenne pepper to create these tasty little seasoned pretzels. They're addictively delicious! CLICK HERE TO PIN THIS FOR LATER
Want the great taste of cinnamon rolls without all the fuss? Whip up a batch
of easy Crescent Cinnamon Roll Bites! These tasty mini cinnamon rolls
made with crescent roll dough will satisfy that cinnamon roll craving, in all
of about 25 minutes flat and without messing with a yeast dough. Serve them up
for breakfast, brunch, as a tasty snack, or as a super fun little party bite.
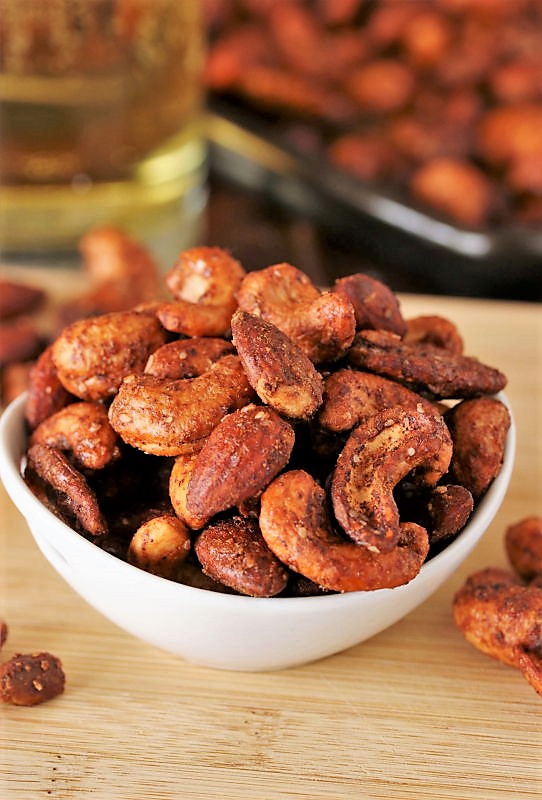
Barbecue Roasted Mixed Nuts ~ Easy to make and chock full of spicy-sweet barbecue flavor. So good, you won't be able to stop at a handful! CLICK HERE TO PIN THIS FOR LATER
Topped with an easy cheesecake mixture made with strawberry jam, Strawberry Cheesecake Strawberry Bites make a fabulous little-bite dessert or treat perfect for Valentine's Day, Easter, Mother's Day, spring, a tea party, or every-day snacking! CLICK HERE TO PIN THIS FOR LATER
I'm going to date myself here, but in high school one of my absolute favorite movies was "Pretty In Pink." I mean, what teenage girl of the '80s could resist those iconic girl-meets-boy brat-pack love stories? Especially when a prom and puffy pink prom dresses were involved!
To this day ... some 30 years later ... I'm hard-pressed to see something all dressed up in pink without thinking of the movie's theme song of the same name. Or of Duckie's sweet silliness.
Peanut Butter Chocolate Chip Granola Bites ~ a delicious anytime-energy-boosting snack treat. Perfect for after school, lunch boxes, or anytime you need a quick snack bite to pick you up!
I have a bit of an obsession with granola ... like these chai, mocha, peanut butter, and honey-vanilla varieties. I just love to snack on its crunchiness.
But you know, sometimes you want a soft-and-chewy granola treat. A chocolatey peanut buttery soft-and-chewy granola treat. Like these Peanut Butter Chocolate Chip Granola Bites.
Or, as I like to call them, "less-guilt silencer of the sweet tooth" balls.
Cinnamon-Sugar Pretzels ~ the warm and comforting taste of cinnamon-sugar is transported into a deliciously crunchy snacking treat. Whip up a batch of these salty-sweet little bites for any party, game-day get-together, or for just plain everyday snacking! CLICK HERE TO PIN THIS FOR LATER
Cinnamon lovers, raise your hand! Because I have the perfect little snack for you.
And oh yes, my hand is up, too.
I love any and all things cinnamon. Perhaps it has to do with the flavor of cinnamon-sugar holding fond memories for me all the way back to my early childhood years.
Nothing beats homemade taste. So when that craving for a salty-crunchy snack hits, skip the grocery store aisle and whip up some tasty classic Homemade Chex Mix yourself!
Think back. Way, way back. Do you remember a time before pre-made Chex Mix was available to buy in the stores? A time before, when that crunchy-salty craving hit, all you had to do was toss a bag of this beloved snack mix in your grocery cart?
A time when you actually had to bake up a batch of Chex Mix yourself?
Covered in chocolaty goodness and powdered sugar, Puppy Chow {or Yuppy Chow} is a classic sweet treat ... perfect for everyday snacking or for holiday gift giving. It's freezer-friendly, too, for make-way-ahead convenience. CLICK HERE TO PIN THIS FOR LATER
Are you familiar with this totally yummy confectioners' sugar-coated stuff? Do you call it Yuppy Chow? Or Puppy Chow? Or White Trash? Or Muddy Buddies??
Yes, I've heard this concoction referred to as many different things. But one thing's for sure ... no matter what you call it, it's just plain good.
Adding that little extra-special decorative touch to your desserts, salads ... or even breakfast dishes ... is easy with Candied Pecans. Follow these simple steps on how to make Candied Pecans, then use the tasty results to beautifully top & adorn a variety of treats!
I have to admit, garnishing & "prettying up" my food is not my strong point. Heck, before I became a food blogger the thought of garnishing my foods to give them that little extra eye appeal never crossed my mind. I guess I'm a subscriber to the "food is inherently beautiful just as it is" philosophy!
But ... truth be told ... a little sprinkling of fresh herbs, a strategically placed sprig of mint or parsley, a shaving of chocolate, or even just a dash of freshly-cracked pepper can go a long way in giving foods a little extra sparkle and appeal. When it comes to adorning those desserts? Candied Pecans can add that little extra-special decorative touch to so many sweet treats!
Topped with a quick-and-easy 3-ingredient creamy Nutella cheesecake mixture, Nutella-Strawberry Cheesecake Bites make a fabulous little-bite dessert, party treat, or afternoon snack. Or, dare we say breakfast, too?
Well, hello National Cheesecake Day! I'm not usually up on all the kinda-random food holidays that exist, but a day dedicated to creamy cheesecake deliciousness? That's one I can get behind! I certainly love a great cheesecake. How about you?
My absolute favorite cheesecake is our family's go-to Thanksgiving dessert, creamy Pumpkin Cheesecake. It's smooth, cinnamon-laced pumpkin deliciousness is divine.
Beautiful Valentines White Chocolate Dipped Pretzel Rods deliver sweet and salty deliciousness in a pretty little blinged-out package. And they're so easy to make! What more could you ask for?
One of my absolute, absolute favorite flavors is the combination of salty and sweet. And one of my absolute favorite ways to deliver that wonderful salty/sweet combination to my taste buds is with chocolate covered pretzels. Or yogurt covered pretzels. Or white chocolate covered pretzels. Okay, or pretty much anything sweet-covered pretzels.
And it's an added bonus when those sweet-covered pretzels are stunningly beautiful, like these pink-studded Valentine White Chocolate-Dipped Pretzels.
White Chocolate-Dipped Pretzel Rods get all dressed up for Christmas with the help of beautiful holiday sprinkles! Or, change the sprinkle colors to match any occasion.
Need a quick-and-easy Christmas treat? Here's an idea for you! These White Chocolate-Dipped Pretzel Rods are perfect for little treat gifts, or for get-together nibbles. Not to mention, they're just plain fun... both to make and to eat.
And, again, I'm realizing that I've been on a total pretzel kick this Christmas baking season. So far, four out of my five posts for December have included pretzels! That was not at all intentional.
These White Chocolate-Dipped Pretzel Rods are perfect for little treat gifts, or for get-together nibbles. Not to mention, they're just plain fun... both to make and to eat.
Now I've moved on to simply dipping pretzel rods in chocolate. White chocolate. With colorful sprinkles. You know, to deck them out for Christmas and all.
I whipped these up at the last minute one night. I was asked to make a batch of cake pops (like these Salted Chocolate ones) to include as a little "giftie" with the gift cards our teacher staff was giving the office staff for Christmas.
Now, I love to make cake pops ... but any of you out there who've made them know they aren't the quickest things to make. They happen to be just a teeny tiny bit tedious and time-consuming. So, I quickly said that wasn't going to happen at this point in the busy Christmas season. But ... I did have another idea for a cute tasty treat.
And that's how these white chocolate-dipped pretzel rods came to be.
I think I whipped up (or dipped up!) an entire bag of pretzel rods in less than 30 minutes. So quick. So easy.
Then I put five of them in a cellophane pretzel baggy, tied it with a colorful ribbon, and voila! ... Christmas white chocolate-dipped pretzel rod bouquets!
I think I whipped up (or dipped up!) an entire bag of pretzel rods in less than 30 minutes. So quick. So easy.
Melt some bark coating together with a tiny bit of shortening. The shortening thins the coating out a bit and makes it so you get a nice, smooth layer of white chocolate. Use a tall, skinny container that is tall enough to fit most of the length of the pretzel rod in it. I had a hard time finding something in my kitchen tall and skinny enough, and ended up using a pottery cup.
Once you've melted your coating, dip a pretzel rod in. Tilt the container a bit if you need to to get the coating as far down the pretzel as you can.
Dipping
Take the pretzel out of the coating, gently shake off the excess, letting it drip back into your container. Then, sprinkle with your chosen sprinkles.
I started off with my sprinkles laid out in shallow platters, thinking it would be best to roll the pretzel rods in the sprinkles. Not the case.
It turned out to be easiest just to grab a pinch of sprinkles and sprinkle it over the pretzel rod with my fingers. Just make sure to do this over a bowl or something with a bit of a side ... not the flat platters like I did.
It turned out to be easiest just to grab a pinch of sprinkles and sprinkle it over the pretzel rod with my fingers.
Why?
Because the sprinkles tend to bounce when they land back on whatever dish you're sprinkling over. I've swept my kitchen floor three times since making these pretzels, and I'm still finding little sprinkle balls hiding around my linoleum!
See my finger marks in the green sugar sprinkles below? Yup, much better way to go than rolling.
Lay your dipped-and-sprinkled pretzels out on a sheet of waxed paper or parchment, let the coating set up, and then ... there you have it! A beautiful, festive platter of White Chocolate-Dipped Pretzel Rods.
Tie a few up with a bow for a cute and tasty little give-away treat.
Check out these other fun white chocolate Christmas treats:
White Chocolate-Dipped Pretzel Rods get all dressed up for Christmas with the help of beautiful holiday sprinkles! Or, change the sprinkle colors to match any occasion.
How to cook Christmas White Chocolate-Dipped Pretzel Rods
In a tall skinny container (such as a pottery cup or perhaps even a small glass vase), melt bark coating or candy melts and shortening together in the microwave per package directions (typically in 30 second intervals, stirring in between).
Dip a pretzel rod in the candy coating, letting excess coating drip off back into the container. Sprinkle immediately with desired sprinkles.
Place on waxed paper and let stand for white chocolate coating to set up.
Store in a sealed container at room temperature.
TRACEY'S NOTES
I pour the leftover white chocolate coating into a plastic storage container and save it for another use later. All you have to do is heat it back up in the microwave, omitting the shortening (since it's already in there).
Affiliate
links are included in this post. I receive a small amount of compensation for
anything purchased from these links at Amazon.com, at no additional cost to you.
Yuppy Chow. Puppy Chow. White Trash. Whatever you call it, the bottom line is this stuff is good! But this Nutella Yuppy Chow is not just good. It's addictively good.
My family was introduced to this delectable sweet treat years ago by my brother's mother-in-law. And ever since, my Father has been in love with Yuppy Chow. To him, it's just not Christmas without it. Of course, the rest of us like it pretty good too.
Crunchy cereal, pretzels, chocolate, ... all coated in powdered sugar ... what's not to love?
HomemadeBlue Cheese Dressing beats the bottled stuff,
hands-down! It makes for one fabulous dressing for salads, or a tasty
dip for chips or wings. Just don't plan on dipping homemade sweet potato
chips in it ... unless you have much better luck than me.
Now just look at those homemade sweet potato chips. Don't they look
good?
Well, unfortunately they weren't.
At least not as good as I expected them to be. And, truth be told, they
were quite "fussy" to make (read that "tedious!"). The amount of effort
required was not worth the result. The flavor was decent, but my texture
result was not.
The potato chips have a combination of chili powder, cumin, and paprika on
them. So hmmmm, I thought to myself - if we dip buffalo hot wings in blue
cheese dressing, might it be tasty to dip these spicy sweet potato chips in blue
cheese dressing, too?? And that's how today's cooking adventure was
born.
So, I went to work making sweet potato chips and blue cheese dressing.
I'm happy to say that the blue cheese dressing is fabulous!
But instead of enjoying it as a dip for sweet potato chips, we'll be enjoying it
on a salad, as a dip for good old vegetable sticks, or with a big platter of
baked buffalo wings.
The homemade blue cheese dressing recipe is from my friend Jennie. And I
can say with confidence that, as of today, it will be a very rare day when
I buy pre-fabbed bottled blue cheese dressing again. I'm now a 100%
homemade convert.
It's pretty simple to make, too.
First, put your blue cheese dressing base ingredients - some plain yogurt,
mayonnaise, grated shallot, fresh lemon juice, and Worcestershire - in a
bowl.
Give it a good stir to get everything all cozy together.
Then put in blue cheese crumbles, and gently fold those in.
You don't want to over-work it and break up all those nice, big hunks of blue
cheese. You want it to be all lumpy-bumpy.
And that's all there is to making homemade blue cheese dressing.
With phase 1 of the adventure done, it was time to move on to the sweet potato
chips. Unfortunately, phase 2 didn't go so well. The first challenge
was to get the sweet potatos sliced thinly - about 1/8" thick. My food
processor isn't able to slice that thinly, and I don't own a mandoline (and
would be afraid I'd cut my fingers off if I did! I'm a clutz.), so I tried
the slicing side of my 6-sided box grater. No luck. This left me
with only the option of slicing by hand. Do you know how hard it is to
evenly slice by hand? Chock that up to "Fussiness" #1.
Next, toss the potato slices in a canola oil-and-spice mix to coat, and lay in a
single layer on baking sheets. Oil coated potato slices stick together and
are not that easy to separate. "Fussiness" #2.
Then bake, watching carefully to make sure they don't burn. Remember that
trouble I had slicing them evenly? Well ... here's what happens when some
of the slices are thinner than others ... they end up like these guys --
"Fussiness" #3.
Oh, and did I mention that half-way through cooking you turn the potato slices
over? I started this process using tongs, but it was hard to grab the
slices because they were so thin. So I ended up just using my fingers ...
on potato slices that were baking in a 400 degree oven. Yes, it did
hurt. Thank you for asking. "Fussiness" #4.
The final result? Sweet potato chips that were very unevenly cooked -
sometimes burnt, sometimes just right, and - more often than not - soggy and
flimsy. While the flavor was good, I was severely disappointed
with the end product.
So ... the very fabulous, absolutely yummy, amazingly wonderful homemade blue
cheese dressing ended up being enjoyed like this ~ with good old celery
sticks. Yum.
Thank you for stopping by The Kitchen is My Playground. We'd love to have
you back soon!
homemade blue cheese dressing, homemade blue cheese dressing recipe,
chunky blue cheese dressing, blue cheese dip for wings
Homemade Blue Cheese Dressing beats the bottled stuff, hands-down! It
makes for one fabulous dressing for salads, or a tasty dip for chips or
wings.
prep time: 10 Mcook time: total time: 10 M
ingredients:
3/4 c. nonfat plain yogurt (I used nonfat plain Greek yogurt)
3/4 c. mayonnaise
1 medium shallot, finely chopped (I usually use just a small slice
from a regular onion, and grate it)
1 T. fresh lemon juice
1 tsp. Worcestershire sauce
1/4 tsp. freshly ground pepper
3 to 4 oz. good blue cheese, crumbled
instructions:
How to cook Homemade Blue Cheese Dressing
In a bowl, combine all dressing ingredients except the blue cheese.
Crumble in the blue cheese and fold together gently. (NOTE: Don't
use finely crumbled blue cheese - you want it chunky. And it's best
to buy a block of cheese and crumble it yourself ~ the cheese is
"more moist" and you get better, larger chunks.)
Store covered in the refrigerator for at least 2 hours before
serving to allow the flavors to meld.