


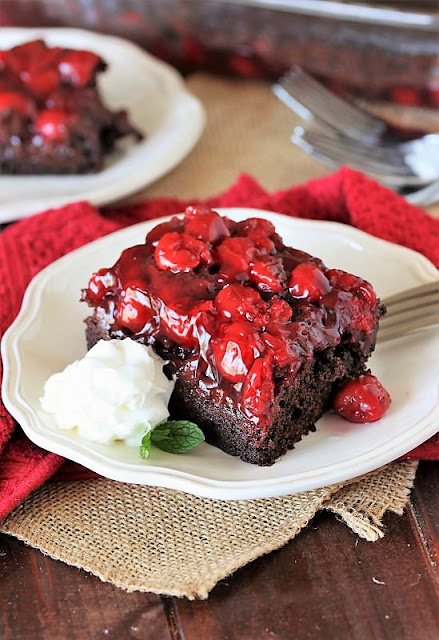
Stuffed with cherry pie filling and drizzled in sweet glaze, Cherry Pie Cookies are little hand-held bites of cherry pie deliciousness. But you get to skip the fork! They're perfectly portable little bites to make for picnics, tailgating, lunchbox desserts, or everyday snacking treats.
CLICK HERE TO PIN THIS FOR LATER
CLICK HERE TO PIN THIS FOR LATER

On the lookout for tasty new sweet treats recipes? Look no further than these fun and adorable Cherry Pie Cookies!
Because if you love the deliciousness of cherry pie and the fun of cookies, you get the best of both worlds with this recipe. They're perfectly portable little bites to make for picnics, tailgating, lunchbox desserts, or everyday snacking treats.
I had been thinking about the idea for Cherry Pie Cookies for a while, based on our popular Apple Pie Cookies and Blueberry Pie Cookies shared a while back. I finally got around to making them, and I'm so glad I did. Because these little cherry beauties are delicious.
Cherry Pie Cookies are perfectly portable little bites to make for picnics, tailgating, lunchbox desserts, or everyday snacking treats.
Taking advantage of the convenience of canned cherry pie filling and prepared pie crust dough, Cherry Pie Cookies are also pretty easy to make. Cut dough rounds, plop on a couple teaspoons of pie filling, seal, and bake. -- Pretty easy, right? They do take a little bit of time to assemble, but each step isn't complicated at all.
In comparison to our previous apple and blueberry pie cookies, I added one extra step for this cherry version -- A little drizzle of sweet confectioners' sugar glaze.
The tartness of the cherry pie filling seemed to need the bit of sweetness brought by the glaze. The simple little glaze compliments the cherry pie filling nicely, and adds a really pretty finishing touch to the baked cookies, as well.
Whip up a batch and pack them up for a picnic or tailgate treat, pop them in lunchboxes, or enjoy them as a tasty little afternoon snack. They're perfect treats for about any occasion.

To whip up a batch of Cherry Pie Cookies, start by rolling out pie crust dough on a lightly floured surface until it's about 1/8 to 1/4 inch thick. Then use a 2 1/2 to 3-inch round cookie cutter or biscuit cutter to cut out as many rounds as possible from the dough -- You'll need two rounds for each cookie.
Place about 1 and 1/2 measuring teaspoons cherry filling in the center of some of the rounds.
It's important to actually measure the cherry pie filling here, as you don't want to over-fill the cookies. Overfilling will lead to blow-outs. -- The filling will leak out all through the edges of the cookies as they bake if there's too much filling.
Sometimes I run a sharp knife through the can of cherry pie filling to break up the cherries into smaller pieces. This makes it easier to fill and seal the cookies because you're not working around big, whole cherries.


Be sure to brush egg wash all over, even on the edges and in the fork marks. Since these mini pies won't be in the oven for as long as a full-size pie, they don't develop a nicely browned crust without the egg wash.
When the egg wash bakes, it gives the cookies a nice golden brown color.

Use a small knife to cut slits in the top of each pie cookie. This allows steam to escape as the cookies bake and helps avoid filling blow-outs.

Bake the cookies up for about 15 to 20 minutes, until the crust is golden brown. Then cool the cookies completely on a wire rack.

Once the cookies are cooled, finish them with a drizzling of sweet glaze.
Stir together confectioners' sugar and a bit of hot water until the mixture is smooth. Then use a small spoon or fork to drizzle the glaze over the top of the cooled cookies.


Cherry Pie Cookies are perfectly portable little bites perfect for picnics, tailgating, lunchbox desserts, or everyday snacking treats. But no matter when and how you enjoy them, they'll be one tasty treat, for sure.
Check out these other tasty cookie favorites:
- Blueberry Pie Cookies
- Apple Pie Cookies
- Cherry Almond Cookies
- Cherry Chocolate Chip Cookies
- Coconut Macaroons
- Grandma's Old-Fashioned Peanut Butter Cookies
- The BEST Classic Snickerdoodles
- How to Make the BEST Oatmeal Cookies
- More cookie recipes

Thank you for stopping by The Kitchen is My Playground. We'd love to have you back soon!
Yield: about 12-15 cookies

Cherry Pie Cookies
Stuffed with cherry pie filling and drizzled in sweet glaze, Cherry Pie Cookies are little hand-held bites of cherry pie deliciousness. But you get to skip the fork! They're perfectly portable little bites to make for picnics, tailgating, lunchbox desserts, or everyday snacking treats.
Prep time: 30 MCook time: 20 MTotal time: 50 M
Ingredients:
For the Cookies:
- 1 (21 oz.) can cherry pie filling
- Pie crust for a two-crust pie, store-bought or use your favorite homemade recipe
- 1 large egg
- 1/4 tsp. water
For the Glaze:
- 1/2 c. confectioners' sugar
- 2 to 3 tsp. hot water
Instructions:
To Make the Cookies:
- Roll out the pie crust on a lightly floured surface until about 1/8 to 1/4 inch thick. Use a 2 1/2 to 3-inch round cookie cutter or biscuit cutter to cut out as many rounds as possible from the dough (you'll need two rounds for each cookie).
- Transfer half of the rounds to a baking sheet and brush the edges with a tiny bit of water (this helps seal the rounds).
- Place about 1 and 1/2 measuring teaspoons of cherry filling in the center of each round (do not over-fill). Top each with one of the remaining rounds. Press the edges to seal each pie cookie, and then use a fork to crimp the edges.
- Prepare an egg wash by lightly beating together the egg and 1/4 teaspoon of water.
- Brush each pie cookie with egg wash, being sure to get some egg wash over the entire surface of the cookie.
- Use a small knife to cut slits in the top of each pie cookie.
- Bake at 350℉ for about 15 to 20 minutes, until crust is golden brown. Remove to a wire rack to cool.
To Glaze the Cookies:
- Combine confectioners' sugar and 2 teaspoons hot water until smooth. Add remaining 1 teaspoon hot water, if needed, to make glaze a consistency that can be drizzled.
- Drizzle over the top of the cooled cookies. Let glaze set to dry.
TRACEY'S NOTES:
- Run a sharp knife through the can of cherry pie filling to break up the cherries into smaller pieces, if you'd like. This makes it easier to fill and seal the cookies.
- Be sure to brush egg wash over the entire surface of the cookie, even in the fork marks. Since these mini pies won't be in the oven for as long as a full-size pie, they don't develop a nicely browned crust without the egg wash. The egg wash gives them a nice golden brown color.
You might also like these other cherry-licious sweet treats:


Affiliate
links are included in this post. As an Amazon.com associate, we earn from qualifying purchases.

Your Cherry Pie Cookies are fantastic! Hope you are having a great week and thanks so much for sharing with us at Full Plate Thursday,484. Come back to see us real soon!
ReplyDeleteMiz Helen
DH is sure to like these cookies, so I saved your recipe. I also noticed at the bottom you shared Cherry Yum Yum. I make this for DH ever Father's Day. It's one of his favorites and it's so simple to make. :) Thanks for sharing!
ReplyDeleteThese are amazing - my dad would have loved them! Pinned! Thanks for sharing this at the What's for Dinner party! Glad you're part of the fun.
ReplyDeleteThese are the cutest cherry pie cookies I could find and I love how easy they look!! Have you ever tried to transport them in the post? Wondering if they would hold up for Christmas!
ReplyDeleteTo transport these let the glaze set completely and place wax paper between the layers. It is never to early to think about Christmas.
DeleteThank you for this recipe! Do these need to be refrigerated if not eaten immediately?
ReplyDeleteThese can be stored at room temperature for a few days. We hope you enjoy.
Delete