Follow these steps for how to melt chocolate on the stove and in the microwave to achieve smooth, fully melted chocolate that's just right for your scratch-made desserts. These techniques work perfectly for chocolate chips and candy melts, too!
Want to whip up a batch of homemade brownies from scratch or a rich flourless chocolate cake? Need to melt some chocolate for that batter and aren't quite sure the best way to do it? Or are you worried you'll ruin that good chocolate you just bought for that special recipe?
Melting chocolate is a simple process really, but it can be tricky to get great results. If the chocolate's not treated carefully, it can scorch, separate, become gloppy, or turn greasy. And none of those things are great for your fabulous scratch-made desserts.
Melting chocolate is a simple process really, but it can be tricky to get great results.
I don't know about you, but being a total chocolate lover, it pains me to ruin good chocolate. And in my book, all chocolate is good chocolate. Which is why I'm super careful when it comes to how I melt my chocolate.
According to my research and personal experiences, the methods that work best for gently and perfectly melting chocolate are to use a double boiler on the stovetop or microwaving the chocolate at 50 percent power.
Well, and here are the steps we need to know for how to melt that chocolate on the stove and in the microwave. Follow these methods to achieve smooth, fully melted chocolate that's just right for your scratch-made desserts.
Regardless of whether you choose the stove top or microwave method, the first step in getting perfectly melted chocolate is to chop it.
Chopping the chocolate ensures it melts evenly and helps prevent the chocolate from scorching.
To chop a bar of chocolate, place it on a cutting board. Then hold a large knife across one corner and press down evenly. Cut about one inch from the corner, then turn the chocolate and repeat with the other corners until the entire block is chopped.
When you chop, try to keep the chocolate pieces relatively close in size for the best even melting. It doesn't all have to be perfectly the same ~ that's impossible to achieve. But try not to have a few huge hunks in along a bunch of tiny chocolate crumbs, if you know what I mean.
Melting Chocolate On the Stove:
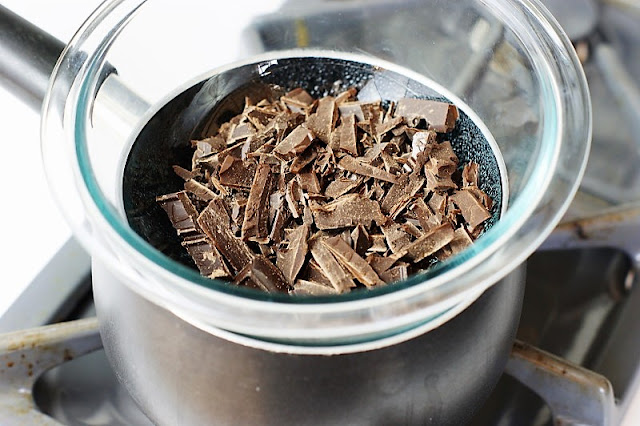
To melt
chocolate on the stovetop, put the chopped chocolate in the top of a double
boiler with barely simmering water in the bottom.
Make sure the water isn't boiling - Using a double boiler with gently simmering water keeps the chocolate away from direct heat, and melts it gently at a low enough temperature to prevent scorching and separating.
Make sure the water isn't boiling - Using a double boiler with gently simmering water keeps the chocolate away from direct heat, and melts it gently at a low enough temperature to prevent scorching and separating.
Make sure the water isn't boiling - Using a double boiler with gently simmering water keeps the chocolate away from direct heat, and melts it gently.
Don't have a double boiler?
No worries - do what I do.
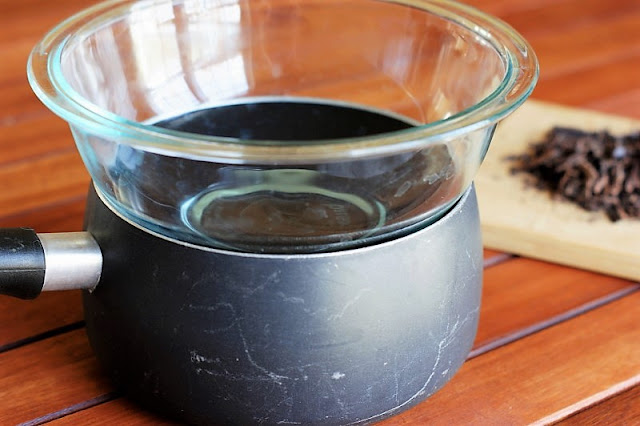
Simply set a heatproof bowl on top of a small saucepan. The bowl should set on top of the saucepan, with
just a small amount of the bowl sitting down inside the pan.
Before you put the bowl on top with the chocolate, fill the
saucepan with 1/2-inch to 1-inch of water. Bring the water to a gentle simmer.
Place the bowl with the chopped chocolate on top of the saucepan, making sure the bottom of the bowl doesn't actually touch the water. If the bowl touches the water, the temperature will get to high and the chocolate can scorch.
Also be sure not to get water, or any liquid, in the chocolate itself. Getting liquid in it will cause the chocolate to harden and become lumpy, a process called seizing.
As the chocolate begins to melt, stir it occasionally to ensure even melting ...
Melting will take about 3 minutes for 8 ounces of chocolate.
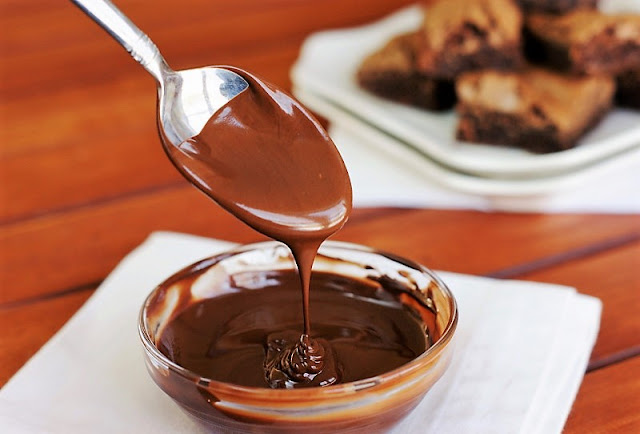
When fully melted, the chocolate will be smooth, glossy, and run easily off the edge of a spoon or spatula.
Melting Chocolate In the Microwave:
To melt chocolate in the microwave, place chopped chocolate in a microwave-safe bowl.
As with the stovetop melting method, be sure to not get any liquid in the chocolate to prevent seizing.
Microwave
the chocolate at 50 percent power for 1 and 1/2 minutes.
Remove the bowl from the microwave and give the chocolate a stir.
Remove the bowl from the microwave and give the chocolate a stir.
If the chocolate's not
completely smooth and melted (which it probably won't be), return the bowl to the microwave and
continue heating the chocolate at 50 percent power for 30 to 45 seconds at a time until
melted, stirring after each time.
It's tempting to heat the chocolate for more than 30 to 45 seconds at a time, but doing so can cause scorching. Be patient! When it comes to melting chocolate, patience is absolutely a virtue for the best results.
It's tempting to heat the chocolate for more than 30 to 45 seconds at a time, but doing so can cause scorching. Be patient! When it comes to melting chocolate, patience is absolutely a virtue for the best results.
When fully melted, the chocolate will be smooth and readily run off the edge of a spoon.
Now, are you planning to use the chocolate for dipping, coating, or molding candy instead of in a batter? Then technically a more precise melting process, called tempering, should be followed.
Tempering is a method of heating chocolate to a specific temperature (based on the type of chocolate) and carefully cooling it to produce a smooth, glossy finish that's ideal for coatings and candies. Simply melting the chocolate as described in this post can result in dull or streaked coatings for your candies. I'll admit I've never actually tempered chocolate ... sorry, I'm not qualified to fully walk through that process.
Does your recipe call for melted chocolate chips or candy melts instead of bar or baking chocolate?
For that, you're in luck! These stove top and microwave melting techniques work perfectly for chocolate chips and candy melts, too. Though I do usually add in about a teaspoon or two of shortening with them to make them melt more smoothly.
Tempering is a method of heating chocolate to a specific temperature (based on the type of chocolate) and carefully cooling it to produce a smooth, glossy finish that's ideal for coatings and candies. Simply melting the chocolate as described in this post can result in dull or streaked coatings for your candies. I'll admit I've never actually tempered chocolate ... sorry, I'm not qualified to fully walk through that process.
These stove top and microwave melting techniques work perfectly for chocolate chips and candy melts, too.
Does your recipe call for melted chocolate chips or candy melts instead of bar or baking chocolate?
For that, you're in luck! These stove top and microwave melting techniques work perfectly for chocolate chips and candy melts, too. Though I do usually add in about a teaspoon or two of shortening with them to make them melt more smoothly.
With these easy steps, you're ready to whip up that batch of chocolate-loaded scratch-made brownies or rich flourless chocolate cake. Or, grab those chocolate chips or candy melts and whip up some tasty chocolate chip cookie dough or peanut butter cookie dough bark.
Either way, your baked goods will be loaded with perfectly and gently melted chocolate.
Either way, your baked goods will be loaded with perfectly and gently melted chocolate.

Thank you for stopping by The Kitchen is My Playground. We'd love to have you back soon!
Yield: varies

How to Melt Chocolate: On the Stove & In the Microwave
Follow these steps for how to melt chocolate on the stove and in the microwave to achieve smooth, fully melted chocolate that's just right for your scratch-made desserts. These techniques work perfectly for chocolate chips and candy melts, too!
prep time: 5 Mcook time: 5 Mtotal time: 10 M
ingredients:
- 8 oz. of Chocolate
instructions:
How to cook How to Melt Chocolate: On the Stove & In the Microwave
For 8 oz. of Chocolate On the Stove:
- With a large knife, chop the chocolate - Hold the knife across one corner and press down evenly. Cut about one inch from the corner, then turn the chocolate and repeat with the other corners until the entire block is chopped.
- Put the chopped chocolate in the top of a double boiler* with barely simmering (not boiling) water. Melting the chocolate in a double boiler with simmering water melts it gently at a low enough temperature to prevent scorching and separating.
- As the chocolate begins to melt, stir occasionally to ensure even melting.
- Melting should take about 3 minutes. When fully melted, the chocolate will be smooth, glossy, and run easily off the edge of a spoon or spatula.
- *Note: If you don't have a double boiler, you can set a heatproof bowl on top of a small saucepan. The bowl should sit on top of the saucepan with just a small amount sitting down inside the pan. Fill the saucepan with 1/2-inch to 1-inch of water, being sure the bowl doesn't actually touch the water. If the bowl touches the water, the temperature will get too high and the chocolate can scorch.
For 8 oz. of Chocolate In the Microwave:
- With a large knife, chop the chocolate - Hold the knife across one corner and press down evenly. Cut about one inch from the corner, then turn the chocolate and repeat with the other corners until the entire block is chopped.
- Place chopped chocolate in a microwave-safe bowl.
- Microwave the chocolate at 50 percent power for 1 & ½ minutes. Remove from the microwave and stir.
- If not completely smooth and melted, return the chocolate to the microwave and continue heating at 50 percent power for 30 to 45 seconds at a time until melted, stirring after every interval. It's tempting to heat the chocolate for more than 30 to 45 seconds at a time, but doing so can cause scorching.
- When fully melted, the chocolate will be smooth and readily run off the edge of a spoon.
Please enjoy these other "How To" posts from The Kitchen is My Playground ...
- How to Make Creme Brulee
- How to Make Lemon Curd {& What the Heck to Do With It}
- How to Make Baked Donuts
- How to Make Chocolate Truffles
- How to Make Homemade Thin Mints
Affiliate
links are included in this post. I receive a small amount of compensation for
anything purchased from these links,at Amazon.com at no additional cost to you.


Wonderful tips on melting chocolate Tracey. Thanks again for linking up to our Celebrate Your Story link party.
ReplyDeleteKari @ Me and My Captain