With these steps on how to make homemade Thin Mints, there's no need to wait until "cookie season" to enjoy them! Mix up a batch of chocolate sugar cookies and dunk them in peppermint-laced chocolate to enjoy a homemade version of the iconic cookie ~ even when no box is in sight.
CLICK HERE TO PIN THIS FOR LATER
CLICK HERE TO PIN THIS FOR LATER
Who remembers back to their childhood "cookie days?" I sure do! I vividly remember my annual door-to-door pilgrimage to sell as many Girl Scout cookies as I could, doing my absolute best to make my fellow troop members and troop leaders proud.
I swear, not a doorbell in my area was safe from my cookie-selling attempts. Of course now-'adays for safety reasons, the door-to-door selling of these tasty beauties has morphed into countless pop-up cookie tables everywhere you look during "cookie season."
What was (and still is) my favorite Girl Scout cookie, you ask? Thin Mints, of course! Yes, we all know and love the classic Thin Mint cookie.
But what's a gal or guy to do when the craving for minty deliciousness strikes out of season?
Make your own homemade Thin Mint Cookies, that's what!
While making homemade Thin Mints indeed involves quite a few steps and takes a bit of time, it's not a hard process at all. It's really just mixing and baking up a batch of chocolate sugar cookies, and then dunking them in peppermint-laced chocolate. And with that, you've got a homemade version of the iconic cookie to enjoy ~ even when there's no box is in sight.
And an added bonus of making your own Thin Mints is you can add a little chocolate drizzle or fun sprinkles embellishment to them, if you'd like. Like I did with these adorable Christmas Thin Mints. A few Christmas non-pareils and snowflake sprinkles dressed these cookies right up for the holidays.
I swear, not a doorbell in my area was safe from my cookie-selling attempts. Of course now-'adays for safety reasons, the door-to-door selling of these tasty beauties has morphed into countless pop-up cookie tables everywhere you look during "cookie season."
What was (and still is) my favorite Girl Scout cookie, you ask? Thin Mints, of course! Yes, we all know and love the classic Thin Mint cookie.
But what's a gal or guy to do when the craving for minty deliciousness strikes out of season? Make your own homemade Thin Mint Cookies, that's what!
But what's a gal or guy to do when the craving for minty deliciousness strikes out of season?
Make your own homemade Thin Mint Cookies, that's what!
While making homemade Thin Mints indeed involves quite a few steps and takes a bit of time, it's not a hard process at all. It's really just mixing and baking up a batch of chocolate sugar cookies, and then dunking them in peppermint-laced chocolate. And with that, you've got a homemade version of the iconic cookie to enjoy ~ even when there's no box is in sight.
And an added bonus of making your own Thin Mints is you can add a little chocolate drizzle or fun sprinkles embellishment to them, if you'd like. Like I did with these adorable Christmas Thin Mints. A few Christmas non-pareils and snowflake sprinkles dressed these cookies right up for the holidays.
To make your own Thin Mints at home, start by preparing the cookie middles.
Mix up a batch of basic chocolate sugar cookies flavored with just a hint of peppermint extract in the dough.
Mix up a batch of basic chocolate sugar cookies flavored with just a hint of peppermint extract in the dough.
Once the dough is mixed, divide it into two equal parts and use your hands to form
each part into a disc. Wrap the dough discs in plastic wrap and refrigerate for 1 hour.
It may be tempting to skip the chilling time, but chilling the dough is essential to keeping the cookies from spreading while baking.
It may be tempting to skip the chilling time, but chilling the dough is essential to keeping the cookies from spreading while baking.
When rolling, sprinkle cocoa powder on your work surface and rolling pin instead of flour to avoid creating white spots on your cookies.
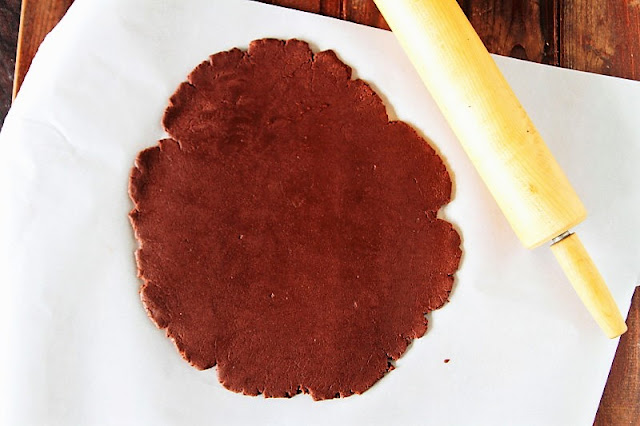
Once chilled, roll the dough to 1/4-inch thickness.
When rolling, sprinkle cocoa powder on your work surface and rolling pin instead of flour to avoid creating white spots on your cookies. The cocoa powder matches the color of the dough and therefore won't leave any funny marks on your cookies.
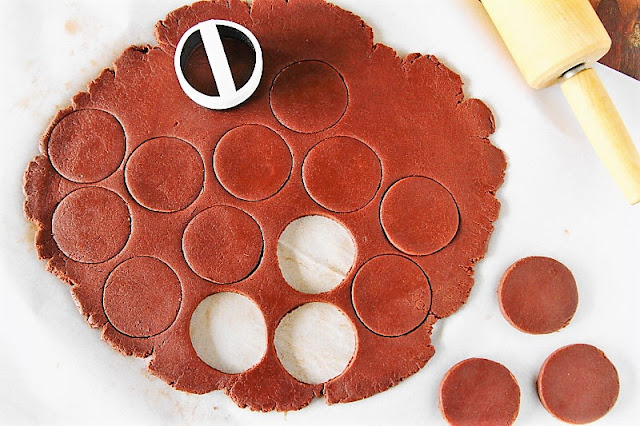
Use
a 2-inch round cookie cutter to cut circles from the dough ...
The cookies will still appear soft when fully baked. And they remain a bit soft, so this homemade version of Thin Mints doesn't quite have that same bit of crunch as the originals ... but the taste is spot on.
Once the cookie middles are completely cooled, it's time to put on their minty chocolate coating.
Coarsely chop about 14 ounces of good-quality semi-sweet chocolate. Heat it in the top of a double boiler, stirring frequently, until the chocolate is completely melted and smooth.
Coarsely chop about 14 ounces of good-quality semi-sweet chocolate. Heat it in the top of a double boiler, stirring frequently, until the chocolate is completely melted and smooth.
Then remove the melted chocolate from the heat and stir in a 1/2 teaspoon of peppermint extract.
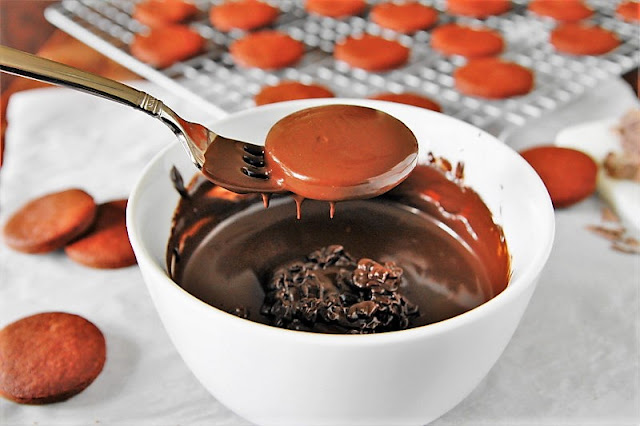
One at a time, use a fork to dip each cooled cookie in chocolate, coating it completely.
Gently tap the fork on the side of the bowl to allow any excess chocolate to drip off.
Gently tap the fork on the side of the bowl to allow any excess chocolate to drip off.
Place the dipped cookies on a baking sheet lined with parchment or waxed paper and allow them to stand until the chocolate is completely set.
If you'd like, place the baking sheet of cookies in the
refrigerator for about 15 minutes to help the chocolate set more quickly. This works especially well if you're especially impatient to gobble up a few of these tasty beauties ... just sayin'.
And that's all there is to it. A little time consuming, but not difficult.
With these steps on how to make homemade Thin Mints, there's no need to wait until "cookie season" to enjoy them!
Simply mix and bake up a batch of chocolate sugar cookies, and dunk them in peppermint-laced chocolate to enjoy a homemade version of the iconic cookie ~ even when no box is in sight.
Thank you for stopping by The Kitchen is My Playground. We'd love to have you back soon!
Yield: about 36 cookies

How to Make Homemade Thin Mints
With these steps on how to make homemade Thin Mints, there's no need to wait until "cookie season" to enjoy them! Mix up a batch of chocolate sugar cookies and dunk them in peppermint-laced chocolate to enjoy a homemade version of the iconic cookie ~ even when no box is in sight.
prep time: 2 hourcook time: 8 Mtotal time: 2 H & 8 M
ingredients:
For the cookies:
- 3/4 c. unsalted butter, softened
- 1 c. granulated sugar
- 1 egg
- 1 tsp. vanilla extract
- 1/4 tsp. peppermint extract
- 1 & ½ c. all-purpose flour
- 3/4 c. unsweetened cocoa powder
- 1 tsp. baking powder
- 1/8 tsp. salt
For the chocolate coating:
- 14 oz. good-quality semi-sweet chocolate
- 1/2 tsp. vegetable or canola oil
- 1/2 tsp. peppermint extract
instructions:
How to cook How to Make Homemade Thin Mints
- MAKE THE COOKIES: In a mixing bowl, beat butter for about 30 seconds with an electric mixer at medium speed. Add sugar and beat on medium speed until fluffy, about 1 minute. Add egg, vanilla extract, and peppermint extract and beat until well combined, scraping down the sides of the bowl as needed.
- In a separate bowl, whisk together flour, cocoa powder, baking powder, and salt. With the mixer on low speed, gradually add flour mixture to the butter mixture, beating until just combined.
- Divide dough into two equal parts and use your hands to form each part into a disc. Wrap in plastic wrap and refrigerate for 1 hour. {It may be tempting to skip the chilling time, but chilling the dough is essential to keeping the cookies from spreading while baking.}
- Working with one disc at a time, remove from the refrigerator and roll to 1/4-inch thickness. When rolling the dough, sprinkle cocoa powder on your work surface and rolling pin instead of flour to avoid creating white spots on your cookies.
- Use a 2-inch round cookie cutter to cut the dough into circles. Transfer cut circles to a baking sheet with a small spatula. Re-roll the remaining dough scraps and continue to cut circles until all the dough is used.
- Bake cookies at 350 degrees for 8 minutes. The cookies will still appear soft. Allow to cool on the baking sheet for 5 minutes, then transfer to a wire rack to cool completely.
- PREPARE CHOCOLATE COATING: Coarsely chop chocolate. Place in the top of a double boiler over simmering water.* Add oil. Heat, stirring frequently, until chocolate is completely melted and smooth. Remove from heat and stir in peppermint extract.
- DIP COOKIES: One at a time, dip each cooled cookie in chocolate. Place each cookie in the melted chocolate, push down with a fork to submerge completely, and use the fork to lift the cookie out. Gently tap the fork on the side of the bowl to allow excess chocolate to drip off. Place dipped cookie on a baking sheet lined with parchment or waxed paper. Repeat with remaining cookies.
- Allow cookies to stand until chocolate is completely set. {Place the baking sheet of cookies in the refrigerator for about 15 minutes to help the chocolate set more quickly, if desired.}
TRACEY'S NOTES
- *To melt chocolate in the microwave, place chopped chocolate in a small microwaveable bowl. Heat at 50 percent power for 1 and a half minutes. Remove from the microwave and stir. If not completely smooth and melted, return the chocolate to the microwave and continue heating at 50 percent power for 30 to 45 seconds at a time until melted, stirring after every interval.
You might also enjoy these other cookie favorites:
Affiliate
links are included in this post. I receive a small amount of compensation for
anything purchased from these links,at Amazon.com at no additional cost to you.
This post is linked with Weekend Potluck.












This is awesome
ReplyDeleteThank you so much, Jessica! They're quite tasty. :-)
DeleteOh my Goodness these are amazing!! I wish I was able to eat one right now LOL
ReplyDeleteBlessings, Roxy