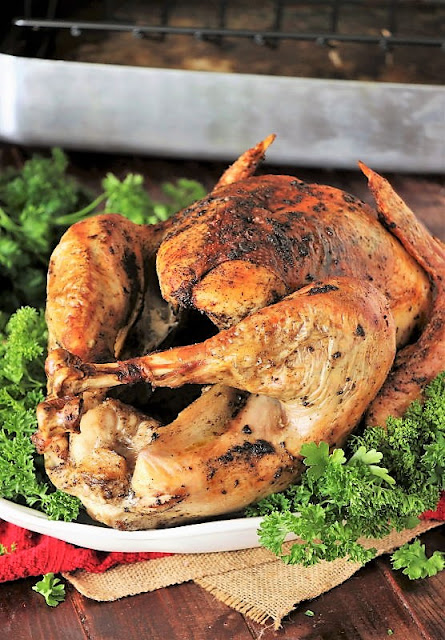
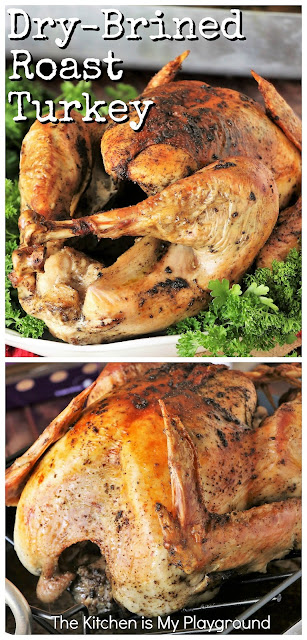
Follow this straight-forward recipe for Dry-Brined Roasted Turkey to
bake up one moist, tender, and flavorful bird. It's actually easy to
do! We've got you covered with roasting and resting tips for how to best
keep that turkey juicy and warm, too.
CLICK HERE TO PIN THIS FOR LATER
CLICK HERE TO PIN THIS FOR LATER
I know we can all be a bit intimidated at the thought of roasting that holiday turkey. -- Myself included the first few times I was in charge of preparing our family's Thanksgiving meal.
Thoughts of serving up an underdone or overly-dry bird race through our mind, when all we really want to do is serve up deliciously-cooked tender, juicy, and flavorful meat as the centerpiece of our holiday feast.
But cooking that turkey doesn't have to be intimidating. Because when it comes right down to it, cooking up a turkey that's moist, juicy, and full of flavor is actually pretty easy and straight-forward.
Rub the turkey with a dry brine salt mixture, refrigerate it for a day or so to let the dry brine work its magic, and roast it up simply in the oven -- that's all there is to it.
Sure, you can get all fancy with lots of herbs and seasonings, elaborate wet brines, tirelessly basting that bird while it's baking -- but I've found all this isn't necessary to produce a beautiful and tasty result.
I've found that sometimes straight-forward and simple are the best -- like with this straight-forward and simple Dry-Brined Roasted Turkey recipe. Rub the turkey with a dry brine salt mixture, refrigerate it for a day or so to let the dry brine work its magic, and roast it up simply in the oven -- that's all there is to it to produce this juicy, tender, flavorful bird.
In this post I'll walk through the steps and tips for roasting a turkey, as well as the basic steps for dry brining. See my post How to Dry Brine a Turkey: Step-by-Step for a detailed guide and tips for the dry brining process itself.
I think you'll be pleasantly surprised at how easy it actually is! And at how tasty the result is, too.
Step 1: Prepare the Dry Brine
This Dry-Brined Roasted Turkey recipe uses a very simple dry brine of just
four basic ingredients --
kosher salt, ground black pepper,
poultry seasoning, and olive oil.
Make sure to only use
kosher salt
when preparing your dry brine -- not table salt. Why? As strange
as it may sound, kosher salt is less intensely salty than regular table salt
and yields the best result. If you use table salt in your brine
mixture, the roasted turkey will taste way too salty to enjoy.
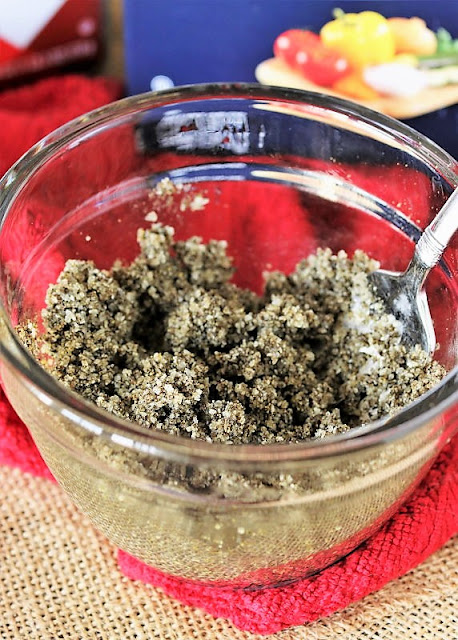
To make the dry brine, mix together kosher salt, poultry seasoning, and ground black pepper with a fork until it's well combined. Then add in a touch of olive oil, and continue mixing until it's all combined.
To make the dry brine, mix together kosher salt, poultry seasoning, and ground black pepper with a fork until it's well combined. Then add in a touch of olive oil, and continue mixing until it's all combined.

Step 2: Dry Brine the Turkey
If you're using a frozen turkey, be sure it is thoroughly thawed before
beginning the dry brine process. Remove the turkey giblets and neck
from inside the turkey cavity and discard them. Sometimes the giblets
are under the neck flap instead of inside the turkey cavity -- so be sure to
check both.
Place the turkey in a
rimmed jelly roll pan
or other rimmed baking dish large enough to hold the turkey and pat the
turkey dry all over, inside and outside, with paper towels.
Then using your fingers, gently loosen the skin of the turkey wherever
possible, lifting the skin a little bit away from the meat without
completely detaching it.
Make sure to only use kosher salt when preparing your dry brine -- not table salt.
With your hands, spread the salt mixture evenly all over the entire turkey
-- under the skin where you've loosened it, on the skin, inside the breast
cavity, and inside the neck cavity. Cover as much of the surface area
under the skin as possible without completely detaching the skin from the
meat.
Cover the turkey completely with plastic wrap. Then, refrigerate the
turkey for 24 to 36 hours to let the brine mixture do its thing.
(Note ~ If you've purchased a kosher or self-basting turkey, do not brine
it. These have already been treated with a salt solution.)
For a more detailed guide and tips for the dry brining process, see my
post How to Dry Brine a Turkey: Step-by-Step
Step 3: Prepare the Turkey for Roasting
Remove the dry brined turkey from the refrigerator and let it stand at room
temperature for 1 hour. This allows the turkey's temperature to begin
to rise, taking the "chill" off it before going in the oven. And it
allows moisture on the turkey's skin to dry out a bit, which results in
crisper skin.
For even crispier skin, uncover the turkey for its last 3-4 hours of dry-brining time in the refrigerator. This allows time for even more of the skin's moisture to dry out before roasting.
Moisture = a stealer of crispness. So the less moisture on the bird, the crispier the skin will turn out.
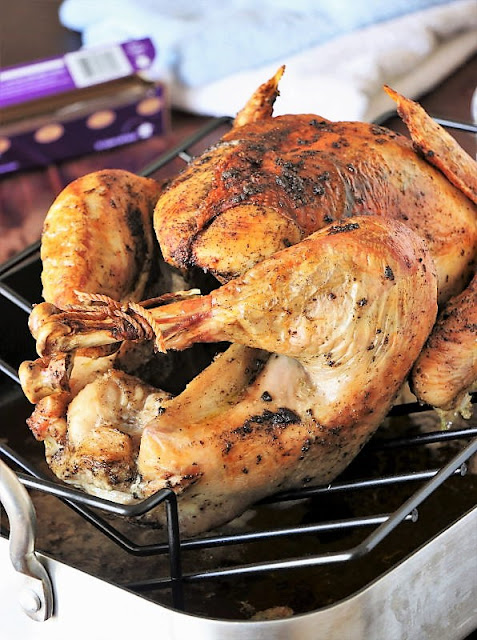
Tie the turkey's legs together with kitchen twine, and fold the wing tips back to keep them from burning.
Then place the turkey, breast side up, on the wire rack of a roasting pan.
Using a roasting pan with a rack keeps the turkey up off the bottom of the pan, keeping the bird above the juices instead of soaking in them. This results in crispier skin.
But what do you do if you don't have a roasting pan to cook your turkey? What can be used instead of roasting pan, and still give a good result?
There are a few options. Instead of a roasting pan with a rack, you could use the bottom of a broiler pan, a large casserole dish, or a large disposable aluminum foil pan you can purchase at the grocery store. Just keep in mind there will be liquid in the bottom of the pan, so use a pan that's large enough to accommodate your turkey and retain the liquid.
If you're using one of these alternative pans without a rack and still want to keep the turkey off the bottom of the pan, a potato can help you out. Remember -- keeping the turkey off the bottom of the pan and out of the juices = crispier skin.
So, how can a potato help? Slice a few thick slices and place them under the turkey in the pan to give it some lift. I suggest about 5 or 6 potato slices strategically placed underneath the turkey should do the trick.
For even crispier skin, uncover the turkey for its last 3-4 hours of dry-brining time in the refrigerator. This allows time for even more of the skin's moisture to dry out before roasting.
Moisture = a stealer of crispness. So the less moisture on the bird, the crispier the skin will turn out.
Tie the turkey's legs together with kitchen twine, and fold the wing tips back to keep them from burning.
Then place the turkey, breast side up, on the wire rack of a roasting pan.
For even crispier skin, uncover the turkey for its last 3-4 hours of dry-brining time in the refrigerator.
Using a roasting pan with a rack keeps the turkey up off the bottom of the pan, keeping the bird above the juices instead of soaking in them. This results in crispier skin.
But what do you do if you don't have a roasting pan to cook your turkey? What can be used instead of roasting pan, and still give a good result?
There are a few options. Instead of a roasting pan with a rack, you could use the bottom of a broiler pan, a large casserole dish, or a large disposable aluminum foil pan you can purchase at the grocery store. Just keep in mind there will be liquid in the bottom of the pan, so use a pan that's large enough to accommodate your turkey and retain the liquid.
If you're using one of these alternative pans without a rack and still want to keep the turkey off the bottom of the pan, a potato can help you out. Remember -- keeping the turkey off the bottom of the pan and out of the juices = crispier skin.
So, how can a potato help? Slice a few thick slices and place them under the turkey in the pan to give it some lift. I suggest about 5 or 6 potato slices strategically placed underneath the turkey should do the trick.
Step 4: Oil the Turkey Skin
Oiling the turkey's skin before baking gives the turkey a nice golden brown
color and also aids in crisping the skin.
Drizzle the turkey with about 3 tablespoons of olive oil. Then use
your fingers to gently spread the oil all over the surface of the turkey.
Step 5: Add Chicken Broth to the Pan
Pour 2 cups of chicken broth into the bottom of the pan. Pour it into
the pan itself, not over the turkey, mind you. We don't want to rinse
off that dry brine mixture and olive oil!
The broth keeps the turkey drippings from burning in the bottom of the pan, and adds a little moisture into the oven while the turkey bakes to help keep the meat juicy.
I know, I know -- I've said moisture is the stealer of crispness when it comes to the turkey skin. But it's a delicate balance here of creating tender, juicy meat and crisp skin.
Step 6: Roast the Turkey
And now comes the easiest but probably most nerve-wracking step of cooking a
turkey -- baking it.
Sure, it's easy. You just pop the turkey in the oven and let heat do
its thing. But how do you know when it's done? We've all
agonized over this question, I'm sure, right?
Before we get into details about this step, the two biggest, most important
tips I can give when it comes to roasting the turkey and knowing when it's
done are:
1. Use a meat thermometer
2. Start checking the bird's temperature early to test for doneness -- well before the end of the stated cooking time
Okay, so it's time to pop the bird in the oven. First, position one of
your oven racks to the bottom third of your oven and remove any racks above
it. This will ensure you have plenty of room to fit that turkey in the
oven. Second, make sure your oven is preheated to 350℉.
Then slide that turkey in and let it bake away! But, for how
long? How long do you roast a turkey?
Roasting time absolutely depends on the size of the turkey. The
general rule of thumb at 350℉ is 13 minutes per pound if baked empty, and 15 minutes per pound if
stuffed.
Since this Dry-Brined Roasted Turkey recipe isn't stuffed, use the 13
minutes per pound guideline. That means approximate cook times would
be:
Now, how do you know when your turkey is done?
Use a meat thermometer!-- It's the only way to truly know that your turkey
is perfectly cooked. I recommend an
instant-read meat thermometer
because they're so quick and easy to use.
The turkey is done when a thermometer inserted into the thickest part of the
breast reads 160℉. Make sure the thermometer is inserted only into the meat, and
doesn't touch any bones. Bones will throw off the temperature reading.
Start checking the bird's temperature early. -- Well before the end of the
stated cooking time. I recommend starting temperature checks at least
30 minutes before you think the turkey should be done.
And if the skin begins getting too dark before the turkey is done, loosely tent the turkey with aluminum foil. This will protect the skin from further browning while allowing the turkey to finish up its cooking.
And if the skin begins getting too dark before the turkey is done, loosely tent the turkey with aluminum foil. This will protect the skin from further browning while allowing the turkey to finish up its cooking.
Step 7: Let the Turkey Rest
Letting the turkey rest is one of the most important steps in preparing a
juicy bird. Why should you let your turkey rest?
Because when the turkey is cooking, the juices are forced away from the heat
into the middle of the turkey. Resting is what allows those juices to
redistribute back out and be re-absorbed all throughout the meat, leading to
moist, juicy meat.
If you cut into the turkey before those juices have redistributed throughout
the meat, the meat will absolutely without-a-doubt be dry. You can
count on it.
Letting the turkey rest is one of the most important steps in preparing a juicy bird.
Don't cut into that turkey for a minimum of 30 minutes after it's come out
of the oven. Let the turkey rest for at least 30 minutes, and I
actually recommend longer resting -- 45 minutes to 1 hour.
How do you rest a turkey?
Resting is easy. Simply remove the turkey from the oven, place the pan
on hotmats on a counter, cover the turkey with foil, and let the turkey rest
in the pan at room temperature.
If you're resting the turkey for only 30 minutes, lightly tent the turkey
with aluminum foil just to keep in some of the heat.
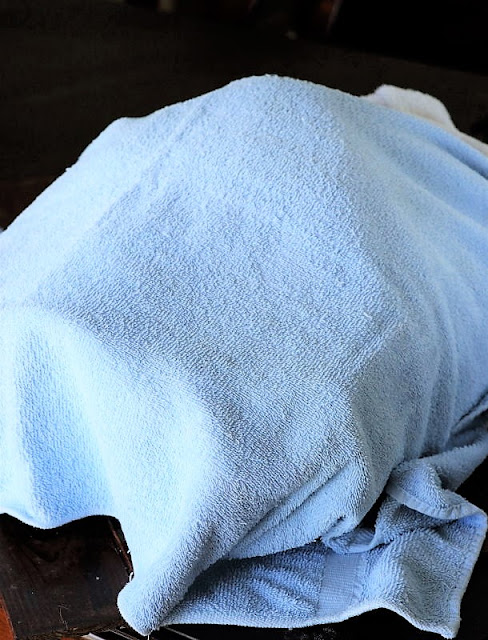
If you're resting for about 45 minutes to 1 hour like we do, you'll want to
more fully cover the turkey to keep it nice and hot for serving. We
cover the turkey loosely with foil, and then lay one or two clean towels
over the foil like in the photo below:
Besides juicy, tender turkey, there's an added bonus to this turkey resting
time. You know all those casseroles you need to reheat for serving? --
Pop them in the oven while the turkey rests, and you'll be good to go!
Once the turkey has rested, carve it and serve it up. Then get ready to enjoy the tender, moist, flavorful deliciousness of this straight-forward, simple Dry-Brined Roasted Turkey. Because deliciousness certainly doesn't need to be complicated.
You'll be pleasantly surprised at how easy it actually is! And at how tasty the result is, too.
Tips for Making & Resting Dry-Brined Roasted Turkey:
- Plan ahead for this recipe -- Keep in mind that thoroughly thawing a frozen 12-pound turkey takes at least 2 days. Be sure to take the turkey out of the freezer enough time in advance to allow for this. Also, the turkey must be refrigerated with the dry-brine mixture on it for at least 24 hours for the salt to do its thing.
-
For crisper skin, remove the plastic wrap from the turkey as it sits in the refrigerator for the last 3-4 hours of the brining time. This allows some of the moisture on the skin to dry out before the turkey hits the oven, making the skin crisp up more as it bakes.
- Coat the entire surface area of the turkey with olive oil before cooking. This helps create beautiful golden-brown, crisp skin.
- Use a meat thermometer to gauge when the turkey is done. -- There truly is no other way to effectively know when the turkey's done. I recommend an instant-read meat thermometer.
- Begin checking the turkey's temperature for doneness early, beginning at least 30 minutes before the end of the stated cooking time.
- If the skin is getting too dark before the turkey is done, tent (cover) the turkey loosely with aluminum foil to shield the skin.
- Rest, rest, rest that bird! Allow the turkey to rest at room temperature for a minimum of 30 minutes after cooking. A longer resting time of 45-60 minutes is highly recommended.
- For longer resting times, cover the turkey loosely with aluminum foil and then with a clean towel to keep it nice and hot for serving.
If you remember nothing else from this post, remember these 4 things
about cooking your turkey:
1. Dry brine it
2. Use a meat thermometer
3. Start checking the temperature early to test for doneness
4. Rest that bird!
2. Use a meat thermometer
3. Start checking the temperature early to test for doneness
4. Rest that bird!
Check out these other Thanksgiving-inspiration recipes:
- How to Dry Brine a Turkey: Step-by-Step
- Baked Ham with Brown Sugar Glaze
- Creamy Broccoli Casserole
- Broccoli-Rice Casserole
- Slow Cooker Stuffing
- Traditional Southern Cornbread Dressing
- Glazed Sweet Potato Coins
- Creamed Pearl Onion Gratin
- Grand Marnier Cranberry Sauce
- Classic Ambrosia Salad
- More main dishes
Yield: 1 turkey
Dry-Brined Roasted Turkey
Follow this straight-forward recipe for Dry-Brined Roasted Turkey to bake
up one moist, tender, and flavorful bird. It's actually easy to do! We've
got you covered with roasting and resting tips for how to best keep that
turkey juicy and warm, too.
prep time: 37 H & 45 Mcook time: 2 hourtotal time: 39 H & 45 M
ingredients:
- 1 (12 lb.) whole turkey (thoroughly thawed, if frozen)
For the Dry Brine Mixture:
- 1/4 c. kosher salt
- 1 1/2 T. poultry seasoning
- 1 T. black pepper
- 2 T. olive oil
For Roasting the Turkey:
- 3 T. olive oil
- 2 c. chicken broth
instructions:
How to cook Dry-Brined Roasted Turkey
To Make the Dry Brine:
- Place kosher salt, poultry seasoning, and pepper in a small bowl. Stir with a fork until well combined.
- Add the 2 tablespoons olive oil and continue to mix until olive oil and the salt mixture are well combined.
To Dry Brine the Turkey:
- If using a frozen turkey, be sure it is thoroughly thawed. Remove the turkey giblets and neck from the turkey cavity; discard.
- Place the turkey in a rimmed jelly-roll pan or other rimmed baking dish large enough to hold the turkey.
- Pat the inside and outside of the turkey dry with paper towels.
- Using your fingers, gently loosen the skin of the turkey wherever possible, lifting the skin a little bit away from the meat without completely detaching it.
- With your hands, spread the salt mixture evenly all over the turkey -- under the skin where you've loosened it, on the skin, and inside the cavity. Cover as much of the surface area under the skin as possible without completely detaching the skin from the meat.
- Cover the turkey completely with plastic wrap.
- Refrigerate for 24 to 36 hours.
To Roast the Turkey:
- Remove the dry-brined turkey from the refrigerator and let stand at room temperature for 1 hour.
- Tie the turkey legs together with kitchen twine and fold the wing tips back.
- Place the turkey, breast side up, on the wire rack of a roasting pan.
- Drizzle the turkey evenly with 3 tablespoons olive oil -- gently spread the oil over the turkey skin with your fingers, if needed. Pour chicken broth into the pan.
- Bake at 350℉ until a meat thermometer inserted in the breast registers 160℉ and the skin is golden brown. This should take from about 1 hour and 45 minutes to 2 hours and 30 minutes, depending on your oven.
- Rotate the pan in the oven after 1 hour. If the skin is getting too dark, cover the turkey loosely with aluminum foil.
- Once the breast registers 160℉ on a meat thermometer, remove the turkey from the oven, cover with foil, and let it stand to rest at least 30 minutes before carving.
TRACEY'S NOTES:
- This recipe works for a 10-14 pound turkey. If you have a larger bird, increase the dry brine amounts slightly. For a 15-pound to 18-pound turkey, I suggest using 1/3 cup of kosher salt, 2 tablespoons poultry seasoning, 1 tablespoon + 1 teaspoon of pepper, and 3 tablespoons olive oil.
- Plan ahead for this recipe -- Keep in mind that thoroughly thawing a frozen 12-pound turkey takes AT LEAST 2 days. Be sure to take the turkey out of the freezer enough time in advance to allow for this. Also, the turkey must be refrigerated with the dry-brine mixture on it for at least 24 hours for the salt to do its thing.
- Make sure to get the salt brine mixture into every area and crevice of the turkey -- This ensures the best result, with juicy tenderized meat throughout the entire turkey.
- For crisper skin, remove the plastic wrap from the turkey as it sits in the refrigerator for the last 3-4 hours of the brining time. This allows some of the moisture on the skin to dry out before the turkey hits the oven, making the skin crisp up more as it bakes.
- Absolutely use a meat thermometer to gauge when the turkey is done. -- There truly is no other way to effectively know when the turkey's done.
- Begin checking the turkey's temperature for doneness early, beginning at least 30 minutes before the end of the stated cooking time.
- Rest, rest, rest that bird! Allow the turkey to rest at room temperature for a minimum of 30 minutes after cooking. A longer resting time of 45-60 minutes is highly recommended.
- For longer resting times, cover the turkey loosely with aluminum foil and then with a clean towel to keep it nice and hot for serving.
You might also like these other meat main dish recipes:
Affiliate links are included in this post. As an Amazon.com associate, we earn from qualifying purchases.
This post is linked with Weekend Potluck.









Thank you SO much for your carefully explained step-by-step process! What a blessing to have this now in my recipe box! I am a grandma; I enjoy cooking but making a turkey is something I avoid...avoided for many years....as it dries out for me. So I choose turkey thighs as I can depend on moist meat. I am very eager to try your turkey recipe!!
ReplyDeleteThank you so much for your kind words! I was always scared to cook the turkey, too, and was very nervous when my Mom passed the torch to me for our family's Thanksgiving turkey. This dry-brined roasted turkey works out well. I even wayyyy over cooked the turkey one time, and it was still moist. Hope it works out great for you! Please do let us know.
DeleteI keep hearing about dry bringing the turkey. This post is great! Really easy to understand and the bird looks amazing. Thanks for joining the What's for Dinner party. I look forward to what delicious treats you'll bring this week - Have a great day!
ReplyDeleteI am anxious to use this dry brined recipe. My question is, are the drippings too salty to use for gravy? My brother in law smokes a turkey, I'm baking a small one so I can make gravy.
ReplyDeleteThank you!
Becca
Wow - that bird looks awesome. I like the idea of the towels to keep it warm while resting! Thanks for sharing at the What's for Dinner party!! Have a fabulous weekend. Hope we see you on Sunday!
ReplyDelete