Blueberry-Lime Iced Tea

June 29, 2011
Beat the summer heat with Blueberry-Lime Iced Tea! ... It's a totally refreshing & flavorful combination.

Beat the summer heat with Blueberry-Lime Iced Tea! ... It's a totally refreshing & flavorful combination.   www.thekitchenismyplayground.com


This Blueberry-Lime Iced Tea is so flavorful and refreshing!  I was inspired to make this by Taylor Takes a Taste's Blue Green Iced Tea, but of course changed it up to create my own version.

But before we get into how to make this delicious tea, I have an exciting announcement!  (Exciting to me anyway.)  I got a NEW CAMERA!  Yes, I have joined the world of digital SLR photography.  This is my first post featuring photos taken with the new camera.  And, boy, do I have a lot to learn!  I fumbled through my first photo shoot, fumbled being the key word, and realized that, wow, I've got a lot of work to do to truly learn what I'm doing.  I appreciate your patience while I learn and improve.

So, since I was playing with different camera settings to see what they would do, I did both an indoor and an outdoor shoot with the iced tea.  Here are some things I very quickly learned during my outdoor shoot:


1.  Ice melts very fast in the balmy 95 degree southern summer heat.

2.  This 95-degree-ice-melting rapidly creates unsightly sweat beads on one's subject, when one's subject happens to be a nice, refreshing, cold iced tea glass and pitcher (exhibit A above ... see around the bottom of the glass??).

3.  I should really put my hair in a ponytail.  Hair really ruins a good shot when the breeze picks up juuussst as you snap your picture!

4.  Outdoor critters are quickly attracted to cut citrus fruit.

5.  And, probably most importantly, I really should be sure to wear some form of footwear for my outdoor shoots.  Deck boards that have been basking in the blazing sun all day are really much hotter than one would think.

But that's enough about my new camera and photo shoot woes for now.  Let's move on to the rockin' Blueberry-Lime Iced Tea.

Beat the summer heat with Blueberry-Lime Iced Tea! ... It's a totally refreshing & flavorful combination.   www.thekitchenismyplayground.com

First step, steep some tea bags - just like you would to make regular sweet (or unsweet, for that matter) tea.

Tea ... it is a-brewin'
Then, make a blueberry simple syrup - that's just blueberries, sugar, and water simmered together.  Simple, huh?  (I just made a pun!  Are you laughing?  At least smiling just a tiny bit??)  Put your berries, sugar, and water together in a saucepan ...

Makings for your simple syrup - it's simple!
... bring them to a boil, reduce the heat, and simmer for just a minute or two.

Simmering
Next, strain the blueberry syrup, squish all the juice out of the berries, and squeeze in the juice of 1/2 a lime.

Combine the brewed tea, blueberry simple syrup, some water, and ice.  Now you've got refreshing and tasty Blueberry-Lime Iced Tea!

I'm thinking this method would work with lots of fruits.  Hmmmmm, think I'm going to have to try blackberry.  What about peach??  I bet peach would be good!  Got other ideas? Shout 'em out in a comment ... I'd love to hear them!

Check out these other refreshing drink recipes:
Beat the summer heat with Blueberry-Lime Iced Tea! ... It's a totally refreshing & flavorful combination.   www.thekitchenismyplayground.com
Thank you for stopping by The Kitchen is My Playground. We'd love to have you back soon!


blueberry lime iced tea recipe, blueberry iced tea, iced tea recipe, ice tea recipe, flavored iced tea
Beverages
Southern
Yield: 2 quarts
Author:

Blueberry-Lime Iced Tea

Blueberry-Lime Iced Tea

Beat the summer heat with Blueberry-Lime Iced Tea! ... It's a totally refreshing & flavorful combination.
prep time: 20 Mcook time: 10 Mtotal time: 30 M

ingredients:

Tea:
  • 4 tea bags (regular or decaf black tea)
  • 2 c. boiling water
Blueberry Simple Syrup:
  • 1 c. blueberries (fresh or frozen, preferably fresh)
  • 3/4 c. granulated sugar
  • 1 c. water
  • Juice of 1/2 a lime

instructions:

How to cook Blueberry-Lime Iced Tea

Brew the Tea:
  1. Pour two cups of boiling water over the 4 tea bags; let steep until cooled.
  2. Squeeze out tea bags. Set aside.
Prepare Blueberry Simple Syrup:
  1. Place blueberries, sugar, and the one cup water in a small saucepan over medium-high heat. Bring to a boil; reduce heat and simmer for about a minute. Remove from heat and let cool.
  2. Once cooled a bit, strain the syrup to remove the blueberries. 
  3. Mash the blueberries against the side of the strainer to release all of their juice, letting this juice strain into your simple syrup. 
  4. Squeeze in the juice of 1/2 a lime; stir to combine.
Mix the Blueberry-Lime Iced Tea:
  1. Combine the brewed tea and blueberry simple syrup in a 2-quart pitcher. Fill the remainder of the pitcher with cold water to make 2 quarts.
  2. Serve over ice with a lime wedge.
TRACEY'S NOTES:
  1. Be sure to use a 2-quart pitcher, not a gallon pitcher.  
  2. If you'd like to make a gallon, double the tea and blueberry simple syrup.
Created using The Recipes Generator

Please enjoy these other tasty summer drinks from The Kitchen is My Playground ...


Affiliate links are included in this post. I receive a small amount of compensation for anything purchased from these links, at no additional cost to you. Thank you for supporting The Kitchen is My Playground when you shop at Amazon.com.


14

Toasted Pesto Rounds {Party Series 8}

June 28, 2011
Mom preppin' Toasted Pesto Rounds

This is it! ... the last post of the party series from my Mom's wine tasting party.  This last little tidbit of yummy party fare is Toasted Pesto Rounds.  It's basically a basil crostini.  And it's so simple.  Mix up a fresh basil-garlic-Parmesan spread (can you already tell this is going to be good??), slather it on toasted baguette slices, and then broil it until it's melty in the middle and a nice golden brown on the edges.  Pretty easy, isn't it?  And I'll assure you, pretty tasty, too.  Our family doesn't reserve these for just party fare ... we sometimes serve these little toasty bites up as a side.  Use a larger-sized bread instead of baguette, and you have a nice alternative to regular garlic bread.

Tapenade Crostini & Toasted Pesto Rounds

The other treat you see on the party platter is Tapenade Crostini.  I talked about these in this post about making tapenade.  To make these:  spread tapenade on baguette slices, sprinkle on some mozzarella or goat cheese, and top it with a piece of sundried tomato and chopped fresh basil; broil until the cheese is melty.  Another simple one, huh?

Tapenade Crostini ... ready for the broiler

I hope you've enjoyed the party series!  And I hope you've found something to add to your entertaining line-up, or that's sparked an idea for you to try.  I'm looking forward to the next time my Mom and I can spend a couple of days in the kitchen together.  The kitchen is her playground, too!


Toasted Pesto Rounds
(Printable recipe)
Ingredients
1/2 c. thinly-sliced fresh basil leaves
1 clove garlic, minced
1/2 c. grated Parmesan cheese
1/3 c. mayonnaise
24 (1/4"-thick) baguette slices


Directions
1.  Combine sliced basil leaves, Parmesan, minced garlic, and mayonnaise; set aside. (Basil mixture can be refrigerated overnight.)

2.  Arrange bread slices in a single layer on a broiler pan or baking sheet. Broil for about 1 minute until lightly toasted. Remove from oven. 

3.  Turn bread slices over and spread untoasted side evenly with basil mixture. Broil for about 2 minutes or until lightly browned.

NOTE: You can substitute dried basil, if desired. Use a little less than 1/2 cup.

Enjoy!


The {Party Series} Posts:
My Mom Throws a Great Party! {Party Series 1}
Grand Marnier & Spiced Rum Fruit Dip {Party Series 2}
Antipasto Platter with Grape Tomato & Caper Salad {Party Series 3}
Marinated Cheese {Party Series 4}
Mini Mocha-Toffee Crunch Cheesecakes {Party Series 5}
Raspberry Chocolate Truffles & Drunken Cherries {Party Series 6}
Raspberry-Almond, Caramel-Walnut, & Lemon-Coconut Bars {Party Series 7}
Toasted Pesto Rounds {Party Series 8}


1

Raspberry Chocolate Truffles & Drunken Cherries {Party Series 6}

June 25, 2011
Wow.  I think I could leave it at that for this post.  Just wow.  But I won't ... I'll tell you a little bit more about these absolutely amazing, delicious, and gorgeous confections my Mom made.


She made the most amazing Raspberry Chocolate Truffles.  And the most sinfully delicious, pack-a-punch Drunken Cherries.  Oh, my!


These two jewels were part of Mom's "little bites" dessert menu for her wine tasting party.  And they were a total hit!  Rave reviews all around.  Aren't they just beautiful?

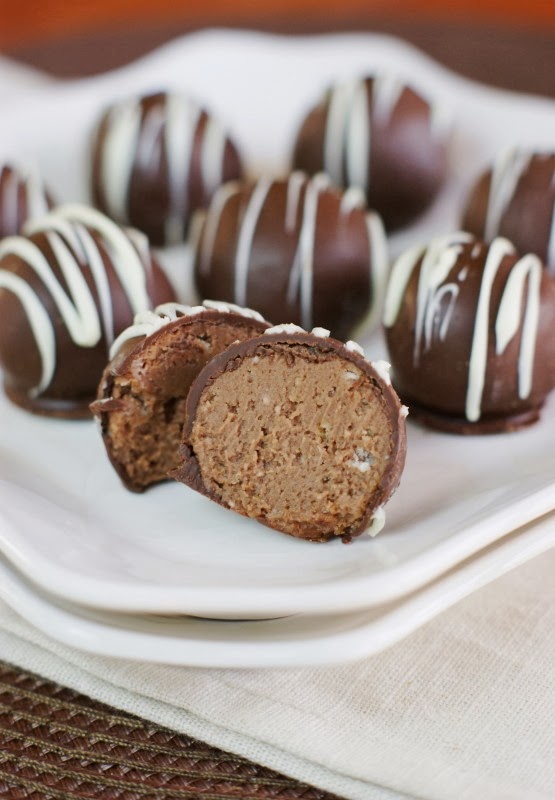
The Raspberry Chocolate Truffles have a soft, creamy chocolate center flavored with raspberry jam and raspberry liqueur.  Yum!


What could be better??  Well, maybe maraschino cherries soaked in Southern Comfort for days-on-end and then dipped in dark chocolate???  Hard to say which one gets my vote ... they're both scrumptious.  Make these.  Make them soon.  You'll be so glad you did!

"Little bites" dessert display

Raspberry Chocolate Truffles
Source: My Mom
For the filling:
2 c. (12 oz. package) semi-sweet chocolate chips
2 (8 oz.) packages cream cheese, softened
1 c. seedless raspberry jam
2 T. raspberry liqueur (such as Chambord or Razzmatazz)
1 1/2 c. vanilla wafer crumbs


For dipping:
1 (1 lb.) package dark chocolate candy melts
2 T. shortening, divided
3 (1 oz.) white chocolate squares


Microwave chocolate chips in a glass bowl on high power, 1 1/2 to 2 minutes or until melted, stirring every 30 seconds. In a separate bowl, beat softened cream cheese until smooth. Add melted chocolate chips, jam, and raspberry liqueur, beating until blended. Stir in crumbs. Cover and chill for 2 hours.
Shape chocolate-raspberry filling into 1" balls; cover and freeze 1 hour or until firm.
Melt dark chocolate candy melts and 1 T. shortening together, according to the candy melt package directions (typically in the microwave at 30 second intervals until melted). Dip balls in the chocolate coating; place on wax paper.
Once all balls have been coated, place white chocolate and 1 T. shortening in a zip-top plastic bag; seal. Submerge in hot water until the chocolate melts, kneading until smooth (or, microwave in 20 second intervals until melted, kneading after each interval). Snip a tiny hole in one corner of the bag and drizzle the white chocolate over the truffles. Let stand until coating is firm. Store in the refrigerator or freezer. Makes about 6 dozen.


Drunken Cherries
Source:  Adapted from Southern Living / February 2011
1 (10 oz.) jar maraschino cherries with stems
1/2 c. Southern Comfort (or brandy)
1 1/2 c. semi-sweet chocolate chips (or some dark chocolate candy melts)
1 T. shortening

Drain the juice from the jar of maraschino cherries.  Pour Southern Comfort over cherries in the jar, filling the jar.  Refrigerate for 2 days, or for up to 1 month.

Drain cherries and pat them dry with some paper towels (you may want to reserve the cherry-infused Southern Comfort to drizzle over vanilla ice cream or to use in mixed drinks!).  Melt the chocolate chips (or candy melts) together with the shortening in a bowl by microwaving for 1 to 1 1/2 minutes until melted and smooth, stirring every 30 seconds.  Dip cherries quickly into melted chocolate, coating the entire cherry; let excess chocolate drip back into the bowl.  Place cherries, stem sides up, on wax paper.  Let stand until chocolate is firm.  Store in an airtight container in the refrigerator or freezer.

* A small public service announcement:  The soaked cherries do carry a bit of a bite from the Southern Comfort they absorb.  Just don't want you to be shocked when you bite into one!


The {Party Series} Posts:
My Mom Throws a Great Party! {Party Series 1}
Grand Marnier & Spiced Rum Fruit Dip {Party Series 2}
Antipasto Platter with Grape Tomato & Caper Salad {Party Series 3}
Marinated Cheese {Party Series 4}
Mini Mocha-Toffee Crunch Cheesecakes {Party Series 5}
Raspberry Chocolate Truffles & Drunken Cherries {Party Series 6}
Raspberry-Almond, Caramel-Walnut, & Lemon-Coconut Bars {Party Series 7}
Toasted Pesto Rounds {Party Series 8}

3

Grand Marnier & Spiced Rum Fruit Dip

June 19, 2011
Light, fluffy, and super delicious Grand Marnier & Spiced Rum Fruit Dip is one of my go-to recipes for entertaining.

Grand Marnier & Spiced Rum Fruit Dip


This is one of my all-time absolute favorite recipes for entertaining.  No joke.

Try this.

And I'm not usually even a fruit dip fan.  But this is not your ordinary fruit dip.  It's light, fluffy, and oh-so-flavorful.

I've had this recipe for so long that, at this point, I have no idea where I got it.  I just know it's fabulous.  Mom decided to "borrow" it for her wine tasting party, and this was one of the menu items I was responsible for during our preparation.  On most of the dishes, I played the role of sous-chef - but on this one I got to take the lead!

This wonderfully flavorful fluffiness starts with sour cream (isn't that the base of almost all dips??), Cool Whip, and a pretty good helping of brown sugar.  Sounding good already, isn't it?  Ohhhh, trust me ... it gets much better.


Then we add the friends - Grand Marnier, dark spiced rum, and Triple Sec.  All I have to say is ... yum.


Mix that all together and then let it chill for a few hours.  The brown sugar will really soften up and kind of melt into the dip.  Give it a really good stir when you get it out of the refrig, and then serve it up with a selection of assorted fruits.  Divine!


Remember how I told you my Mom is really creative?  Well, here's another one of her amazing creations.  Check out these hors d' oeuvre picks my Mom made.  They're perfect for placing alongside a fruit platter.  A little fancier than toothpicks, don't ya think?  And she's so sweet she even made me a set.

Thank you for stopping by The Kitchen is My Playground. We'd love to have you back soon!


fruit dip with Grand Marnier, fruit dip with spiced rum, fruit dip with liquor, grand marnier spiced rum fruit dip recipe, easy fruit dip recipe
Dips
American
Yield: about 1 & 1/2 cups
Author:
Print
Grand Marnier & Spiced Rum Fruit Dip

Grand Marnier & Spiced Rum Fruit Dip

Light, fluffy, and super delicious Grand Marnier & Spiced Rum Fruit Dip is one of my go-to recipes for entertaining.
Prep time: 10 MCook time: Total time: 10 M

Ingredients:

  • 1/2 c. sour cream
  • 1 c. Cool Whip
  • 4 T. brown sugar
  • 1 1/2 T. Grand Marnier
  • 1 T. dark spiced rum
  • 1 T. Triple Sec

Instructions:

  1. Combine sour cream, Cool Whip, and brown sugar. Stir together until well mixed. 
  2. Add liquors and whisk.
  3. Refrigerate for several hours. Stir well before serving. 
  4. Serve with an assortment of berries and fruit.
TRACEY'S NOTES:
  1. If the liquors "settle out" while the dip is refrigerated, don't worry - just whisk or stir them back in at serving time.
  2. We love this dip best with bananas. Sometimes we spoon the leftovers over sliced bananas and eat it as a dessert -- tasty.
Created using The Recipes Generator

The {Party Series} Posts:
My Mom Throws a Great Party! {Party Series 1}
Grand Marnier & Spiced Rum Fruit Dip {Party Series 2}
Antipasto Platter with Grape Tomato & Caper Salad {Party Series 3}
Marinated Cheese {Party Series 4}
Mini Mocha-Toffee Crunch Cheesecakes {Party Series 5}
Raspberry Chocolate Truffles & Drunken Cherries {Party Series 6}
Raspberry-Almond, Caramel-Walnut, & Lemon-Coconut Bars {Party Series 7}
Toasted Pesto Rounds {Party Series 8}

6

My Mom Throw's a Great Party! {Party Series Part 1}

June 18, 2011
I have such a wonderful Mom!  Not only is she a fabulous friend with whom I love to hang out, she's a fantastic hostess too.  She knows how to throw a great party! 


This past week she hosted a wine tasting party for a group of her girlfriends.  They get together about once a month for fellowship and fun, rotating the hosting role, and typically partaking in some grape-based beverages along the way.  Want to know what they call themselves?  This is such a sweet and fun name ... they call themselves Thirsty Girls.  That's so clever!  It's even more clever when you know that what brought them all together to begin with was their love for shag dancing, and they dance at a place called Thirsty's II.  Yup, just about every Sunday night (and possibly Saturday, too) you can find most of this group dancin' the night away at Thirsty's  II.  And that's how Thirsty Girls was born.

I was fortunate enough to be able to take part in this Thirsty Girls party, both as a guest and as my Mom's sous-chef.  I'm not sure which part was more fun - actually attending the party and getting to know my Mom's friends, or hanging out in the kitchen with Mom for two days as we prepared all the food together (well, a good portion of the food - my Mom is super organized and already had quite a bit of it done!).  Both were a blast. 

We had the camera going the whole time we were in the kitchen, snapping pictures all along the way.  That means I get to share a whole bunch of super-tasty recipes with you that are just perfect for entertaining.  So get ready!! ... Here comes the "Party Series!"

Let's start this first post of the series with a look at some of Mom's nice little touches.  She's quite creative, and came up with some elegant wine-themed decorating ideas.  Then I'll share her Garlic & Dill Marinated Shrimp recipe, and a list of her full party menu so you'll know what to look forward to.  Sound good?

Nice Touch #1:  Cork Table Cards

Table labels
Or, table labels, you might say!  Aren't those cute?  We started with business card-sized cards that I embossed.  That's one of my other hobbies ... making cards and miscellaneous things (like these) using a dry-embossing technique.  Look closely at the lower right corner of the cards and you'll see an embossed wine bottle, wine glass, or grape bunch.  I know - it's really hard to see in this picture.  Hopefully I'll be getting a better camera real soon.

Next Mom used a serrated knife to cut a sliver off the bottom of some corks.  This made a flat base so the corks would sit up on the table.  Then she made a slit in the top of each cork ...

Preparing the corks
... and slid in the label card.

The table label line-up

Nice Touch #2:  "Elevated" Centerpiece
Check it out!  Mom made her light fixture into an "elevated" centerpiece by tying wine glasses to it with pretty ribbons!  How absolutely clever!!  Other than it being creative and beautiful, there was a functional reason for this, too ...

"Elevated" centerpiece
... her table was completely full with her tasty treats!  This "elevated" centerpiece is certainly one way to solve a serving space problem.

"The Spread"
Nice Touch #3:  Herb Bouquets
Mom made little herb bouquets in bud vases to place around the house.  They looked great, and were a very simple way to add a festive touch.  Though it looks like a bug or two may have been having a party out in the garden on this basil leaf!  I guess everyone ... or everything? ... loves fresh basil.

Herb bud vase bouquet
Now for the menu. 

On the savory side:
Garlic & Dill Marinated Shrimp (recipe below)
Tortellini Salad
Antipasto Platter with Grape Tomato & Caper Salad
Tarragon Chicken Salad-Stuffed Profiteroles
Marinated Cheese
Grand Marnier & Spiced Rum Fruit Dip
Shrimp Curry Mango Bites
Tapenade Crostini
Toasted Pesto Rounds

The savories
For dessert:
Almond-Raspberry Bars
Caramel-Walnut Bars
Lemon-Coconut Bars
Raspberry Chocolate Truffles
Mini Mocha-Toffee Crunch Cheesecakes
Dark Chocolate Drunken Cherries


I told you Mom throws a great party!
The desserts


Garlic & Dill Marinated Shrimp
Source:  A Family Friend
Ingredients
2 T. butter, melted
1 T. olive oil
1 T. minced garlic
2 T. minced dill weed
2 T. minced shallots (or grated mild onion)
2 T. fresh lemon juice
Dash cayenne pepper
Salt & pepper, to taste
2 lbs. peeled & deveined cooked shrimp

Directions
1.  Mix all ingredients, except shrimp, to make the marinade.  Pour marinade over shrimp.  

2.  Refrigerate for several hours before serving.

Enjoy!

Garlic & Dill Marinated Shrimp
7

2nd Bee Robbing of the Season!

June 17, 2011
We got to rob our bees on Sunday for the second robbing of the season ... two weeks earlier than usual!! 

Why am I so excited about this?  Because it means that we may be able to get in a third robbing this season, which is extremely rare.  Mark's cut-off date for robbing each year is July 15.  He absolutely will not rob the bees after this, to make sure they have enough time left in the summer to make their stash of honey for food through the winter.  Typically, we rob in late May and then again sometime between July 4th and July 15th.  This year, the bees had replenished the honey supply super quickly after the first robbing, so we were able to rob them again here in mid-June.

Another reason I'm so excited is that I made my debut as the cap-cutter.  Yes, a new responsibility has been added to my Assistant Beekeeper role.  I'm honored to be have been deemed worthy to wield the knife!

Keep working, little bees!!  Mark and I would love to steal share in your honey one more time this summer!

Here is a sampling of pictures from Sunday's robbing - views I didn't capture in our previous robbing.  If you'd like to check out pictures of the whole process, click here to read my post from our May robbing.  Oh, and on a side note ... I'm working on a recipe for Honey Cheesecake.  I'll post that recipe as soon as I feel it's blog-worthy.  Enjoy the pictures!


 That's Mark scraping (cleaning) the excluder.  The excluder is the wire "rack" you see ... the wires are close enough together to prevent the queen from getting through (the queen is just a bit bigger than all the other bees).  The box from which we rob our honey is placed on top above the excluder.  The result?  All eggs are laid in the box below the excluder and we rob from frames that are egg-free in a box above the excluder.  Oh, and Mark's being all manly and not wearing gloves, or his bee keeper suit ... I wish he wouldn't do that.  WEAR YOUR SUIT AND GLOVES, Mark!  Join me in "yelling" at him, will ya?


 This is the box that was above the excluder, and Mark's just taken it off the hive to bring it inside for us to rob.  This box is called a "super."  See all those bees still hanging around on it?  We don't want to bring those inside.  So, how do we get them off? ...


1.  Smoke 'em ...


2.  ... brush 'em (gently!), and ...


3.  ... leaf blower 'em.  Yes, leaf blower.  That definitely gets any of the tough hanger-around'ers to depart.  This 3-step method seems to work really well.  This robbing, we brought zero bees inside, and last time we only brought in three.  Pretty good, I'd say!


This is Mark taking a frame out of the super.  There are nine frames in there.


This is a close-up of the honey comb in the frame.  I think it's beautiful!  That white-ish stuff is the caps.  We'll cut that off to release the honey.


And that's me making my debut as the cap cutter!!  Mark says I did an excellent job.  Yay!


4

Chocolate Chip Cookie Dough Truffles (or Pops!)

June 9, 2011
Like eating cookie dough better than the actual baked cookies?  Then these Chocolate Chip Cookie Dough Truffles are for you!


I'm sad to say that one of my teacher friends has decided to leave teaching. Well, I guess I'm sad and glad at the same time. Sad for us (her team) and for the students who will miss out on her awesomeness, but glad for her because she's off to pursue her dream. I have a whole lot of respect for people with the courage to leave the "known" to venture out into the unknown to make one of their dreams happen. And that's what she's doing! She's starting up her own home decorating business, and I'm thrilled for her. I will miss seeing her bright smiling face every morning, though. And borrowing ... oh, let's just admit what it truly is ... stealing her wonderfully creative classroom ideas (though I do think I always asked for her permission first!). And her artistic flair. And her positive energy. Oh, I could go on and on ...

So, what does this have to do with Chocolate Chip Cookie Dough Truffles, you ask? Well, that's what I made for her going away party.

The concept for these stem from the "sweet treats on a stick" and cake balls trend that's all the rage right now, spurred by the ever-popular Bakerella's cake pops.  Other players in the trend - Starting to Simmer , Gonna Want Seconds , The Caramel Cookie , and Bella Baker - just to name a few.  And did you know that Starbucks is now selling cake pops?  Yes - Starbucks.  Bakerella really started something!

The trend has extended waaaaaayy beyond cake pops.  How about cheesecake pops from The Food Addicts or The Recipe Girl?.  "Crispy treats" pops from Savoring the Thyme ?  Marshmallow pops from Savory Sweet Life ?  And then there's Baked Perfections's Chocolate Chip Cookie Dough Pops that inspired these truffles.

Yes, I did indeed make some of these actually on a stick ... I'll show you that later in this post ... but opted for truffles for the party.  I thought truffles (or balls, as some would say) seemed a little bit more adult party-ish.  And I think truffles sounds a little bit more stylish than balls.  So we're going to go with the name Chocolate Chip Cookie Dough Truffles for these little confections.

I will say right up front that making truffles (or pops) is a bit tedious and time-consuming.  The word I usually use for things like this is fussy.  Yes, these are indeed fussy.  And normally I avoid anything too fussy.  But, every now and then, I make an exception.  I'm okay with fussy about 3 or 4 times a year.  Especially if it's for a friend.  So let's see how to make these little gems.

To get these truffles started, mix up some chocolate chip cookie dough.  Just leave out the eggs, 'cause you don't want anyone getting salmonella poisoning, and the baking soda, 'cause we really don't care if these rise or not.  We're going to eat the dough raw, you see!  I used the classic Nestle Toll House recipe for cookie dough, but any recipe will certainly work.  Just leave out the eggs and the leavener, and add in a little water to replace the liquid the eggs would have provided.

Then take portions of your dough and roll them into balls.  I use a cookie scoop to get my portions roughly the same size.  I think that's a 1 1/2 T. scoop, if I remember correctly.


Next, use a fork ... or a toothpick or your fingers ... to dip your dough balls in melted chocolate coating.  I use the fork method.  I really just drop the dough ball into the coating and then pluck the ball out with the fork ... flat on the fork tines, not stabbing it with the tines.  (I had a picture of this process to show you here, but for some reason it wouldn't upload to the site.  Bummer.)  Then place the chocolate-coated balls on wax paper to let the coating set up.


Drizzle the tops randomly with another color of candy coating to make them look all fancy-like.  (This also hides some of the lumpy-bumpies in the coated balls!)


You can pop the tray in the frig to help the chocolate set.  And then ...
... bite in and enjoy!  Mmmmmmmm ... I love chocolate chip cookie dough!!  Especially when it's covered with chocolate.  Big happy smile.


So, what if you want to make pops instead of truffles?  It's the same basic process, except with a stick and maybe some sprinkles.  I'm going to show just the major steps in the process here.  If you'd like details, I highly suggest checking out directions from the Queen of Cake Pops herself - click the link for Bakerella's detailed instructions , complete with a video.

Here's my pop-making station, all ready to go.  The white rectangle to the left is a piece of styrofoam with holes poked it in.  This comes in real handy after dipping your pops, 'cause you can't really just set the pops down on wax paper like you can the truffles.  You'll see how this works in just a bit.


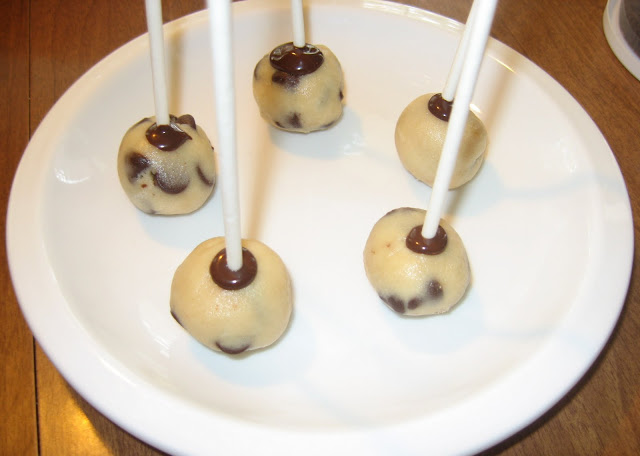
To help the pop stick stay in place, dip it about a 1/4" deep in your melted candy coating.  Immediately pop it into your dough ball, and then let the coating set up for a bit.  This will help the dough ball stay on the stick when you dunk it.


Then dunk the dough ball into the candy coating, rock it gently (but pretty quickly) back and forth to get it all coated.  Don't stir it around - you'll get way to much coating on it, or, more likely, it will fall off the stick and be stranded in the chocolate pool.


While the coating is still wet, sprinkle on some jimmies or sprinkles.  Or, you can leave them plain if you'd like.  Then, stick your pop into the handy-dandy styrofoam holder.


I drizzled a few, like I did for the truffles, instead of using sprinkles.  Just to be different.


You can serve them up just as they are, or wrap 'em up in little plastic wrappers like I did here:


I tied the five pops you see above up with a fat ribbon to make a little bouquet and gave the bouquet to the daughter of one of my friends.  A cookie dough pop bouquet, how sweet!  Pun intended ...

And there you have it.  Chocolate Chip Cookie Dough Pops for the sweet daughter of a friend, and Chocolate Chip Cookie Dough Truffles for a brave, courageous friend starting a new adventure in her life.  I wish you well with your new venture, G!  I'll be calling when I need a substitute!!

Check out these other super tasty chocolatey treats:
Thank you for stopping by The Kitchen is My Playground. We'd love to have you back soon!

chocolate chip cookie dough, chocolate chip cookie dough recipe, edible cookie dough recipe, how to make chocolate chip cookie dough truffles
Candy
Yield: about 60 truffles

Chocolate Chip Cookie Dough Truffles

Like eating cookie dough better than the actual baked cookies? Then these Chocolate Chip Cookie Dough Truffles are for you!
prep time: 1 H & 45 Mcook time: total time: 1 H & 45 M

ingredients:

  • 1 c. unsalted butter, room temperature
  • 3/4 c. granulated sugar
  • 3/4 c. brown sugar
  • 1/4 c. water
  • 1 tsp. vanilla extract
  • 2 1/4 c. all-purpose flour
  • 1 tsp. salt
  • 1 (12 oz.) package mini chocolate chips
  • 1 (1 lb.) package candy melts (I used Make 'n Mold dark chocolate flavored candy wafers, available at most craft stores)
  • 1 T. shortening

instructions:

How to cook Chocolate Chip Cookie Dough Truffles

For cookie dough centers:
  1. In a large bowl combine butter, sugar, brown sugar, and vanilla; beat until creamy. Beat in water. Combine flour and salt. Add flour mixture to butter/sugar mixture; mix well. Stir in chocolate chips.
  2. Shape cookie dough into approximately 1" balls, using about 1 T. dough per ball; set aside on wax paper. 
  3. Cover with plastic wrap and refrigerate for about 1 hour.
To make truffles:
  1. In a small deep bowl, melt candy melts and shortening together in the microwave per candy melt package directions (typically in 30 second intervals, stirring in between). 
  2. Use a fork to dip each cookie dough ball in the candy coating, letting excess coating drip off back into the bowl. Place on wax paper to dry.
  3. To decorate with drizzled candy coating, place candy melts in a zip-top sandwich bag on a microwave safe dish. Heat in 20 second intervals until melted, kneading after each heating. Using scissors, snip a tiny hole in one corner of the bag. The smaller your cut, the smaller the drizzle. Drizzle the melted candy coating back and forth over the truffles.
  4. Let stand until firm. 
  5. Store truffles in the refrigerator or freezer.
Created using The Recipes Generator

Affiliate links are included in this post. I receive a small amount of compensation for anything purchased from these links, at no additional cost to you. Thank you for supporting The Kitchen is My Playground when you shop at Amazon.com.


22
Blog Design: Tracimichele.com. Powered by Blogger.